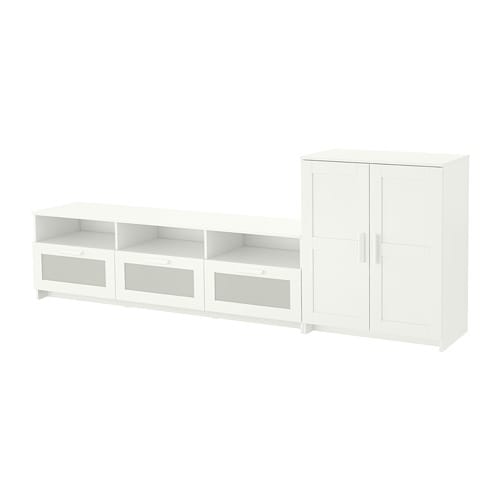
IKEA BRIMNES TV storage combination instructions
Full Product Name: IKEA BRIMNES TV storage combination, white, 101 5/8x16 1/8x37 3/8 "
Article Number: 495.727.43
Number of user manuals: 2
Manuals and Parts List
There are 2 assembly instruction manuals to fully build IKEA BRIMNES TV storage combination. Scroll down to view all.
1. Instructions for IKEA Brimnes cabinet with doors white


IKEA BRIMNES Product Details

BRIMNES TV storage combination, white, 101 5/8x16 1/8x37 3/8 "
Article number: 495.727.43
This TV unit has large drawers that make it easy to keep remote controls, game controllers and other TV accessories organized.
Adjustable shelves, so you can customize your storage as needed.
Cable outlets make it easy to lead cables and cords out the back so they’re hidden from view but close at hand when you need them.
With a glass-door cabinet, you can show off as well as protect your glassware or your favorite collection.
If you complete with cabinet lighting you get a nice light that shines through the glass shelves and creates a cozy atmosphere in the room.
Measurements:
Width: 101 5/8 " (258 cm)Depth: 16 1/8 " (41 cm)
Height: 37 3/8 " (95 cm)
Max. TV weight: 66 lb (30 kg)
Maximum load/drawer: 20 lb (9 kg)
Need help?
Have a question about IKEA BRIMNES or Need to request a missing manual?
Questions and Answers
Number of questions: 3
Adams Charles
Posted on Oct 16, 2023I recently purchased the Brimnes TV storage combination and I'm having trouble assembling it. Can you provide more detailed instructions on how to assemble the drawers? Specifically, I'm having trouble figuring out how to attach the drawer slides to the cabinet frame. Could you please provide a step-by-step guide or a video tutorial that can help me with this issue?
Adams
Kenzo @ EasyRebuild
Answered on Oct 18, 2023To attach the drawer slides to the cabinet frame on the BRIMNES TV storage combination, follow these steps:
1. Locate the drawer slides that came with the product. There should be two slides for each drawer.
2. Identify the left and right drawer slides. They are usually marked "L" and "R" to indicate the side.
3. Extend the inner part of the drawer slide all the way out.
4. Align the outer part of the drawer slide with the pre-drilled holes on the cabinet frame. Secure it in place using the screws provided.
5. Repeat step 4 for the other side of the drawer opening, making sure the slides are level and aligned.
6. Gently push the inner part of the drawer slide back into the outer part until it clicks into place.
7. Test the drawer by opening and closing it to ensure the slides are properly installed and functioning smoothly.
Let me know if you have any other questions
Lisa
Posted on Sep 11, 2023I am having trouble assembling the Brimnes TV storage combination and I need help with attaching the glass-door cabinet to the frame. Can you please provide me with instructions on how to do this?
Lisa
Kenzo @ EasyRebuild
Answered on Sep 13, 2023To attach the glass-door cabinet to the frame of the BRIMNES TV storage combination:
1. Locate the cabinet frame and the glass-door cabinet components from the assembly instructions.
2. Align the holes on the back of the glass-door cabinet with the corresponding holes on the top of the cabinet frame.
3. Insert the screws provided and tighten them securely using a screwdriver to attach the glass-door cabinet to the frame.
4. Ensure the glass-door cabinet is properly aligned and secured to the frame.
5. If you have any issues or need further clarification, refer back to the step-by-step assembly instructions that came with your BRIMNES TV storage combination.
Let me know if you have any other questions
Paul Howell
Posted on Aug 01, 2023I am having trouble assembling the Brimnes TV storage combination. The instructions are not clear, and I am stuck on step 5. Can you please provide a more detailed explanation or video tutorial to help me complete assembly?
Paul
Kenzo @ EasyRebuild
Answered on Aug 03, 2023For step 5 of assembling the BRIMNES TV storage combination, here are some more detailed instructions:
First, locate the back panel and the side panels. Align the side panels with the back panel, making sure the holes on the side panels match up with the corresponding holes on the back panel.
Next, use the screws provided in the hardware kit to secure the side panels to the back panel. Make sure to tighten the screws fully, but don't overtighten.
If you're still having trouble, I'd recommend checking the IKEA assembly video for this specific product. The visual guidance may help clarify the step-by-step process. Let me know if you have any other questions


