IKEA HAVSTA nesting tables, set of 2 instructions
Full Product Name: IKEA HAVSTA Nesting tables, set of 2, gray
Article Number: 504.142.10
Number of user manuals: 1
Manuals and Parts List
There is one assembly instruction manual to fully build IKEA HAVSTA nesting tables, set of 2.
IKEA HAVSTA Product Details

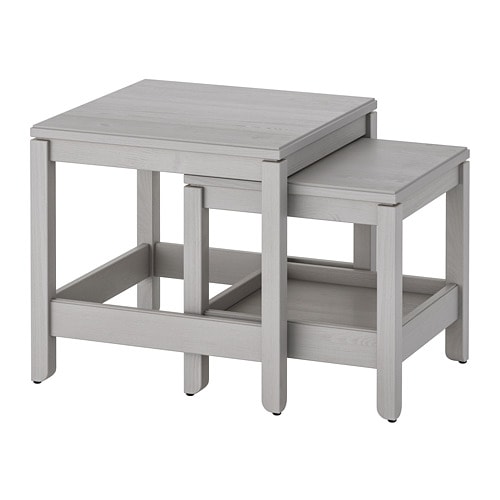
HAVSTA Nesting tables, set of 2, gray
Article number: 504.142.10
Solid pine with crafted details and a brushed surface gives a genuine, sturdy feeling, a timeless look and it will age gracefully.
Made of wood from sustainable sources.
Practical storage shelf with high edges helps you to keep things organized and frees up the table top.
Can be used individually or be pushed together to save space.
The surface is durable and easy to keep clean.
Scandinavian design with clean simple lines makes it easy to combine the table with furniture in different styles.
Solid wood is a natural, renewable and separable material.
Matches other furniture in the HAVSTA series.
Made of solid wood with crafted details and a brushed surface, HAVSTA nest tables add a genuine feel and charm to your room. You can use them individually or push them together to save space.
Need help?
Have a question about IKEA HAVSTA or Need to request a missing manual?
Questions and Answers
Number of questions: 2
Alicia Clark
Posted on Sep 02, 2023How do I clean the brushed surface of the Havsta nesting tables? Is there a specific cleaning product recommended by Ikea for this type of finish?
Alicia
Vanessa
Posted on Dec 13, 2022I have recently purchased these nesting tables, but I am having trouble getting the top surfaces to align properly when pushed together. Are there any specific instructions or tips you can provide to help me achieve a smooth joint?
Vanessa
Alice @ EasyRebuild
Answered on Dec 15, 2022To align the top surfaces of the HAVSTA nesting tables when pushed together, please follow these steps:
1. Ensure the table bases are level and stable on the floor. Use the adjustable feet to level the tables if needed.
2. Gently push the tables together, aligning the edges of the tabletops. There may be a slight gap between the tops, which is normal.
3. Once the tables are aligned, you can use the included metal brackets to secure the tables together. Attach the brackets to the underside of the tabletops to hold them in place.
4. If there is still a slight gap between the tabletops, you can try placing a thin piece of cardboard or plastic shim in the gap to fill it and create a smooth surface.
Let me know if you have any other questions! I'm happy to provide more guidance on properly setting up your HAVSTA nesting tables


