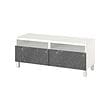
IKEA TONSTAD TV storage combination instructions
Full Product Name: IKEA TONSTAD TV storage combination, brown stained oak veneer/clear glass, 134 5/8x18 5/8x78 7/8 "
Article Number: 295.150.46
Number of user manuals: 3
Manuals and Parts List
There are 3 assembly instruction manuals to fully build IKEA TONSTAD TV storage combination. Scroll down to view all.
1. Instructions for IKEA Tonstad cabinet with doors brown stained oak veneer


2. Instructions for IKEA Tonstad cabinet with sliding glass doors brown stained oak veneer
IKEA parts list for Tonstad cabinet with sliding glass doors brown stained oak veneer:


3. Instructions for IKEA Tonstad tv unit brown stained oak veneer
IKEA parts list for Tonstad tv unit brown stained oak veneer:


IKEA TONSTAD Product Details

TONSTAD TV storage combination, brown stained oak veneer/clear glass, 134 5/8x18 5/8x78 7/8 "
Article number: 295.150.46
The brushed veneer gives the furniture a unique look and a personal character.
You can easily hide cords by leading them between shelves and out the cable outlets on the underside of the bench.
This TV storage combination lets you display your favorite belongings behind glass doors, while hiding cords and electronics behind closed doors.
Adjustable shelves make it easy to customize the space according to your needs.
The furniture in the TONSTAD series is designed to go well together. Use each piece of furniture as a beautiful solitaire or combine them to create your own personal solution.
Classic design meets nicely brushed veneer in the TONSTAD series, giving the furniture a unique character. Details like integrated solid oak handles and knobs create a timeless, elegant look in your home.
Measurements:
Depth: 18 5/8 " (47.2 cm)Height: 78 7/8 " (200.5 cm)
Width: 134 5/8 " (341.8 cm)
Max. TV weight: 66 lb (30 kg)
Need help?
Have a question about IKEA TONSTAD or Need to request a missing manual?
Questions and Answers
Number of questions: 1
Jill
Posted on Jun 19, 2023I am having trouble assembling the tonstad tv storage combination and I need help with step 2 of the instructions. Could you please provide me with more detailed information or a video tutorial to help me complete this step?
Jill
Alice @ EasyRebuild
Answered on Jun 21, 2023For step 2 of assembling the TONSTAD TV storage combination, here are some more detailed instructions:
First, make sure you have all the necessary hardware and tools ready. You'll need the screws, washers, and other fittings specified in the instruction manual.
Locate the two side panels and the top panel. Carefully align the top panel with the side panels, ensuring the edges match up properly.
Use the screws provided to securely attach the top panel to the side panels. Make sure the screws are tightened evenly on both sides to ensure a stable connection.
If you're having trouble getting the panels to align correctly, double-check that you've positioned them in the right orientation as shown in the instructions. You may need to gently tap or adjust the panels until they fit together seamlessly.
Take your time with this step and refer back to the diagrams in the manual if needed. Proper assembly at this stage will ensure the rest of the unit goes together smoothly. Let me know if you have any other questions


