IKEA HAVSTA nesting tables, set of 2 instructions
Full Product Name: IKEA HAVSTA Nesting tables, set of 2, dark brown
Article Number: 604.041.97
Number of user manuals: 1
Manuals and Parts List
There is one assembly instruction manual to fully build IKEA HAVSTA nesting tables, set of 2.
IKEA HAVSTA Product Details

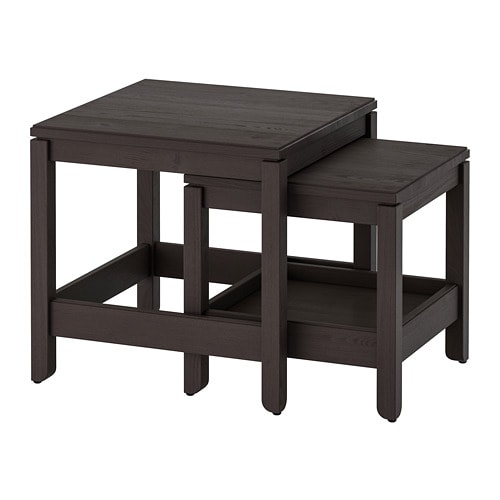
HAVSTA Nesting tables, set of 2, dark brown
Article number: 604.041.97
Solid pine with crafted details and a brushed surface gives a genuine, sturdy feeling, a timeless look and it will age gracefully.
Made of wood from sustainable sources.
Practical storage shelf with high edges helps you to keep things organized and frees up the table top.
Can be used individually or be pushed together to save space.
The surface is durable and easy to keep clean.
Scandinavian design with clean simple lines makes it easy to combine the table with furniture in different styles.
Solid wood is a natural, renewable and separable material.
Matches other furniture in the HAVSTA series.
Made of solid wood with crafted details and a brushed surface, HAVSTA nest tables add a genuine feel and charm to your room. You can use them individually or push them together to save space.
Need help?
Have a question about IKEA HAVSTA or Need to request a missing manual?
Questions and Answers
Number of questions: 2
Hawkins Scott
Posted on Sep 15, 2022Can you provide instructions on how to assemble the tables? I've got two separate pieces but no idea how to put them together.
Hawkins Scott
Walters Katherine
Posted on Jul 13, 2022I'm having trouble assembling the nesting tables. The instructions seem unclear and I'm struggling to attach the legs to the table top. Can you provide additional guidance on how to do this?
W. Katherine
Kenzo @ EasyRebuild
Answered on Jul 15, 2022To attach the legs to the table top for the HAVSTA nesting tables:
1. Locate the pre-drilled holes on the underside of the table top. These are where the legs will connect.
2. Align the legs with the pre-drilled holes, making sure the legs are oriented correctly. The legs should fit snugly into the holes.
3. Use the screws provided in the hardware pack to securely fasten each leg to the table top. Tighten the screws fully.
4. Once all four legs are attached, double-check that they are firmly in place and the table is stable.
If you are still having difficulty, I'd recommend reviewing the step-by-step instructions carefully again. Feel free to reach out if you have any other questions


