IKEA RUNNEN decking, outdoor instructions
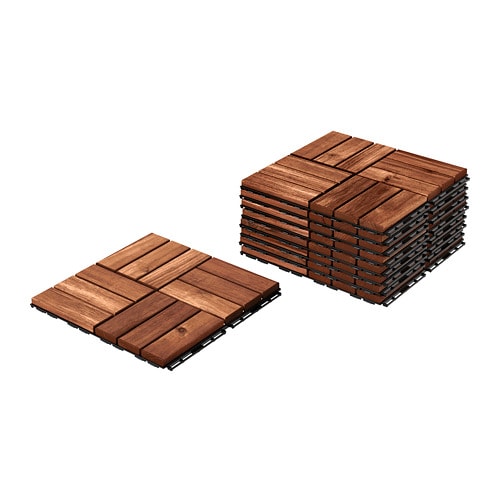
Full Product Name: IKEA RUNNEN Decking, outdoor, brown stained, 9 sq feet
Article Number: 902.342.26
Number of user manuals: 1
Manuals and Parts List
There is one assembly instruction manual to fully build IKEA RUNNEN decking, outdoor.
1. Instructions for IKEA Runnen decking outdoor brown stained
IKEA parts list for Runnen decking outdoor brown stained:
No hardware or fittings found for Runnen decking outdoor brown stained.


IKEA RUNNEN Product Details

RUNNEN Decking, outdoor, brown stained, 9 sq feet
Article number: 902.342.26
Floor decking makes it easy to refresh your terrace or balcony.
The floor decking can be cut if you need to fit it around a corner or a pole
You can easily take the floor decking apart and put it together again if you want to clean the floor underneath.
You can easily protect your floor against wear and tear by reglazing it on a regular basis, about once a year.
You can upgrade your balcony or deck in an instant and also section off an area for lounging and for dining. It’s easy to install and clicks together. Choose one color or mix and match.
Measurements:
Total area: 8.72 sq feet (0.81 m²)Length: 11 3/4 " (30 cm)
Width: 11 3/4 " (30 cm)
Thickness: 3/4 " (2 cm)
Area: 0.97 sq feet (0.09 m²)
Package quantity: 9 pack (9 pack)
Need help?
Have a question about IKEA RUNNEN or Need to request a missing manual?
Questions and Answers
Number of questions: 4
Sanders James
Posted on Jan 27, 2024I've just laid down my RUNNEN Decking and I'm having trouble clicking the pieces together. The instructions are a bit confusing, can you provide more detailed steps on how to assemble it? Also, what is the recommended spacing between each piece to ensure proper installation?
Sanders James
Alicia
Posted on Aug 02, 2023I am having trouble clicking the pieces together, they just won't fit. I've followed the instructions but it seems like the grooves are not aligning properly. Any suggestions on how to fix this?
Alicia
Alice @ EasyRebuild
Answered on Aug 04, 2023The issue you are facing with the RUNNEN decking pieces not clicking together properly is likely due to slight variations in the manufacturing tolerances. Here are a few suggestions that may help:
1. Ensure the surface underneath is completely level. Any unevenness can prevent the pieces from aligning correctly.
2. Check the grooves on each piece - make sure there is no debris or damage preventing a smooth connection.
3. Try gently tapping the pieces together using a rubber mallet. The slight force can help the grooves lock into place.
4. If a piece is still not fitting, you can try shaving down the edges slightly with a utility knife to remove any excess material.
5. As a last resort, you can use a small amount of waterproof wood glue to secure the pieces together, though this will make them more difficult to disassemble later.
With a bit of patience and these troubleshooting steps, you should be able to get the RUNNEN decking pieces clicked together securely. Let me know if you have any other questions
Steve Aguirre
Posted on Jun 20, 2023I'd like to know if the RUNNEN Decking is suitable for a balcony with a slight slope. Will it stay in place and not slide around or will it require additional support?
Christopher Miller
Posted on Dec 13, 2022I would like to ask if it's possible to cut the decking boards to fit around a specific shape or curve, such as a rounded railing or a corner of a balcony. If so, what tools and techniques are recommended for making clean cuts?
Alice @ EasyRebuild
Answered on Dec 15, 2022The RUNNEN decking boards can be cut to fit around specific shapes or curves, such as a rounded railing or a corner of a balcony. To make clean cuts, it's recommended to use a fine-toothed saw, such as a jigsaw or a handsaw with a fine-toothed blade. Take measurements carefully and mark the cutting lines before making the cuts. Go slowly and make sure to keep the saw blade perpendicular to the surface of the decking to ensure a clean, straight cut. You can also use a straight edge or a square to guide the saw and ensure the cuts are precise. Sanding the edges lightly after cutting can help create a smooth, finished look


