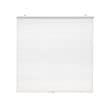
IKEA HOPPVALS cellular blind instructions
Full Product Name: IKEA HOPPVALS Cellular blind, white, 23x64 "
Article Number: 102.906.26
Number of user manuals: 1
Manuals and Parts List
There is one assembly instruction manual to fully build IKEA HOPPVALS cellular blind.
IKEA HOPPVALS Product Details

HOPPVALS Cellular blind, white, 23x64 "
Article number: 102.906.26
The blind lowers the general light level and provides privacy by preventing people outside from seeing directly into the room.
May help you reduce heating costs as the air inside the honeycomb structure creates a layer of insulation.
The cord is hidden inside the blind, making it safer if you have children at home.
Can be mounted on the wall or ceiling.
No need to change fittings or drill new holes if you change your blinds. The included wall/ceiling brackets are suitable for HOPPVALS and TRIPPEVALS cellular blinds and SKOGSKLÖVER roller blind
Roll down the cellular blind as far as you need to enjoy privacy and avoid being disturbed by strong sunlight. Daylight filters through the white blind, which gives a soft light in the room.
Measurements:
Length: 64 " (163 cm)Width: 23 " (58.5 cm)
Area: 10.23 sq feet (0.95 m²)
Need help?
Have a question about IKEA HOPPVALS or Need to request a missing manual?
Questions and Answers
Number of questions: 2
Lindsey
Posted on Aug 29, 2023I'm trying to install my Hoppevals cellular blind, but I'm having trouble getting it to hang straight. Are there any specific tips or tricks for ensuring that the blind is properly aligned and hangs evenly?
Valerie
Posted on Jan 09, 2023I'm interested in installing this Hoppvals cellular blind in my home, but I have a specific question about the installation process. Can you please provide more information on how to attach the wall or ceiling brackets? Are there any special tools required for the job, and are they included with the purchase of the blind?
Valerie
Alice @ EasyRebuild
Answered on Jan 11, 2023The installation process for the HOPPVALS cellular blind is relatively straightforward. The wall/ceiling brackets included with the purchase are designed to be easy to install without any special tools.
To attach the brackets, you'll need a pencil, a level, a drill, and screws suitable for your wall/ceiling material. First, use the pencil and level to mark the placement of the brackets on the wall or ceiling. Then, drill pilot holes and secure the brackets in place using the screws.
Once the brackets are installed, simply click the blind into the brackets. No additional tools are required for this step. The blind should fit snugly and securely onto the brackets, allowing you to easily raise and lower it as needed.
If you have any further questions about the installation process, I'd be happy to provide more guidance. Just let me know if you need any clarification or have additional concerns


