IKEA SMÅSTAD / UPPFÖRA 6-drawer chest instructions
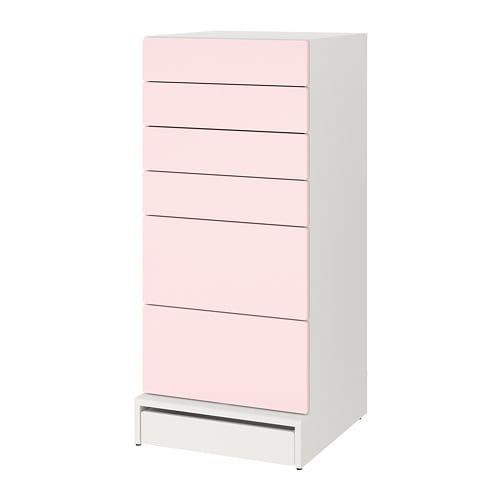
Full Product Name: IKEA SMÅSTAD / UPPFÖRA 6-drawer chest, white/pale pink, 23 5/8x24 3/4x53 1/2 "
Article Number: 593.876.79
Number of user manuals: 4
Manuals and Parts List
There are 4 assembly instruction manuals to fully build IKEA SMÅSTAD / UPPFÖRA 6-drawer chest. Scroll down to view all.
1. Instructions for IKEA Konstruera drawer without front white


2. Instructions for IKEA Konstruera drawer without front white


3. Instructions for IKEA Uppfoera drawer white


IKEA SMÅSTAD / UPPFÖRA Product Details

SMÅSTAD / UPPFÖRA 6-drawer chest, white/pale pink, 23 5/8x24 3/4x53 1/2 "
Article number: 593.876.79
In the 4 top drawers, there’s plenty of space for folded baby clothes and small things like pacifiers, bibs and socks.
In the 2 deep drawers at the bottom, you can store toys, blankets and other larger things.
Stands evenly on an uneven floor; adjustable feet included.
To save on our natural resources and make use of as much of the tree as possible, we have used sawmill leftovers and scrap wood in the particle boards for SMÅSTAD.
This chest of drawers has space for everything from a baby's first clothes, pajamas, and socks to a younger child's shirts, pants, and underwear – and then some.
Measurements:
Depth: 24 3/4 " (63 cm)Height: 53 1/2 " (136 cm)
Width: 23 5/8 " (60 cm)
Need help?
Have a question about IKEA SMÅSTAD / UPPFÖRA or Need to request a missing manual?
Questions and Answers
Number of questions: 1
Andrea Hamilton
Posted on Nov 30, 2022I'm having trouble assembling the Småstad 6-drawer chest, specifically with attaching the top panel to the sides. The instructions are unclear and I don't know which parts go where. Can you provide additional guidance or a more detailed manual?
Andrea
Kenzo @ EasyRebuild
Answered on Dec 02, 2022To attach the top panel to the sides of the SMÅSTAD 6-drawer chest, you'll need to locate the designated hardware pieces and follow these steps:
1. Identify the top panel and side panels. The top panel should have pre-drilled holes along the edges.
2. Position the side panels upright and align the top panel on top, ensuring the pre-drilled holes on the top panel match up with the holes on the side panels.
3. Use the screws provided in the hardware pack to securely fasten the top panel to the side panels. Make sure the screws are tightened evenly.
4. Once the top panel is attached, you can proceed with assembling the rest of the chest according to the instructions.
If you're still having trouble, I recommend double-checking the hardware pieces and reviewing the step-by-step diagrams in the assembly manual carefully. Let me know if you have any other questions


