IKEA MICKE corner workstation instructions
Full Product Name: IKEA MICKE Corner workstation, white, 39 3/8x55 7/8 "
Article Number: 502.507.13
Number of user manuals: 1
Manuals and Parts List
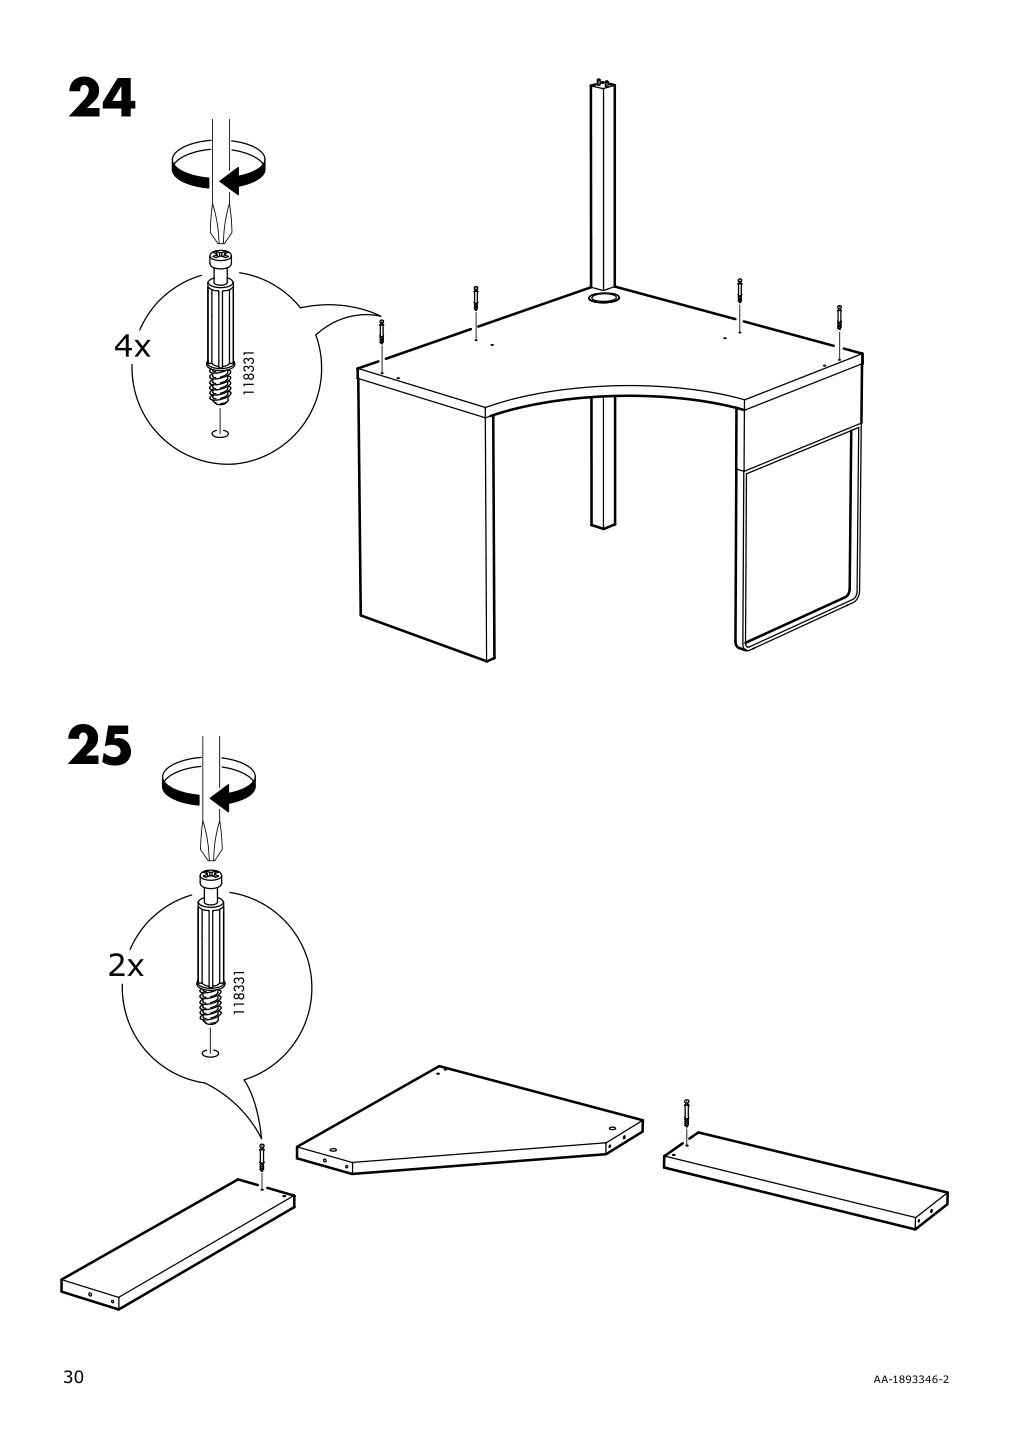
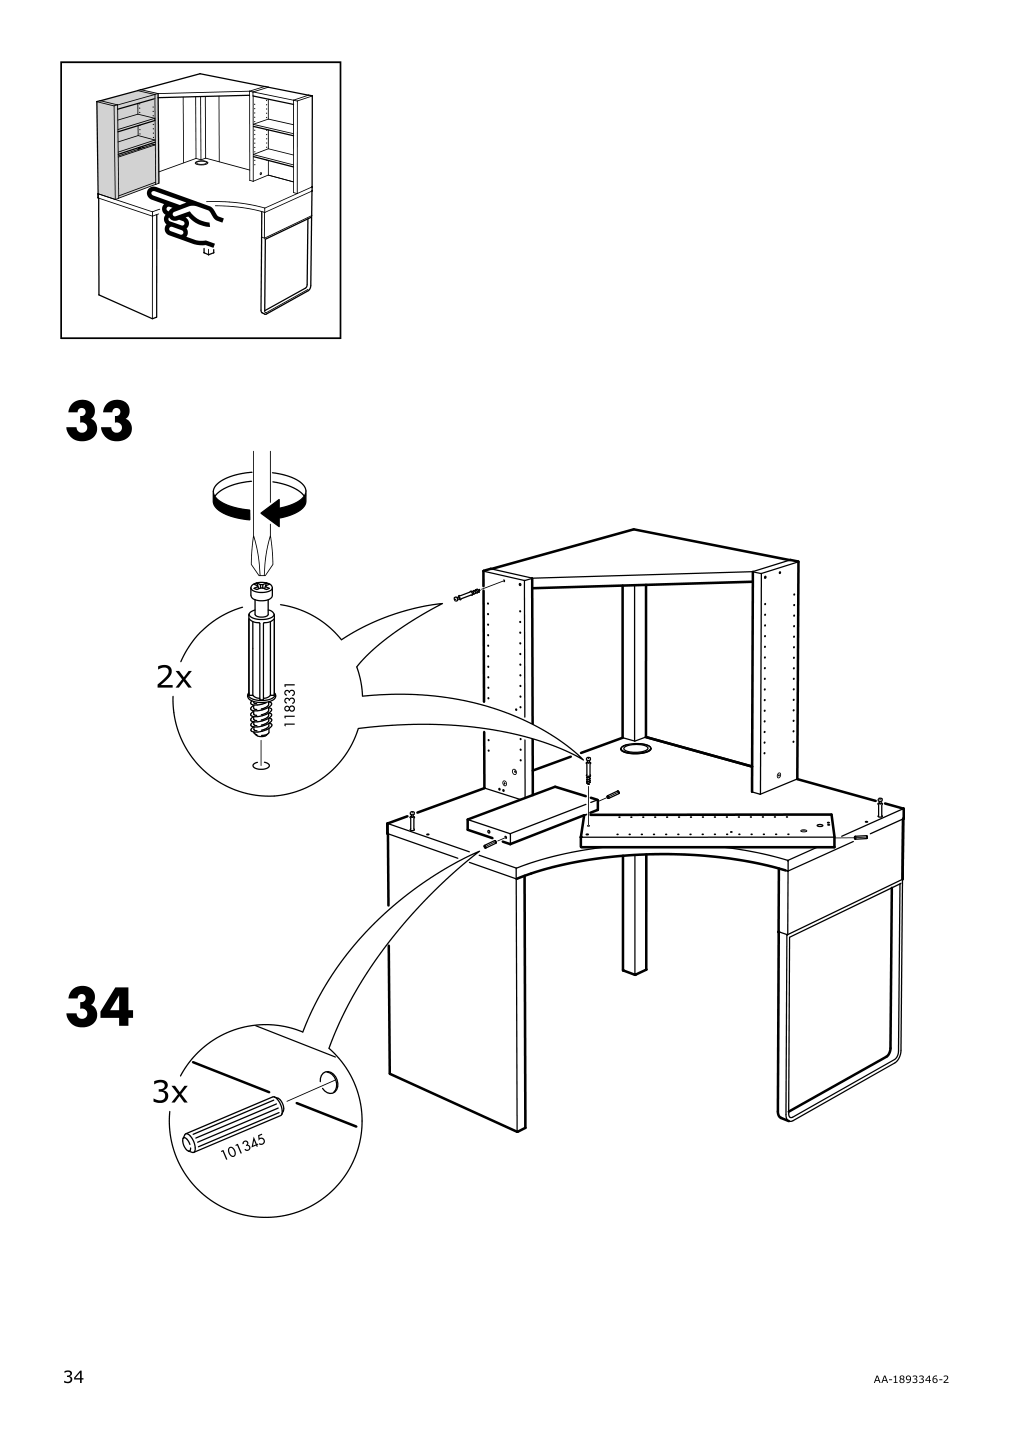
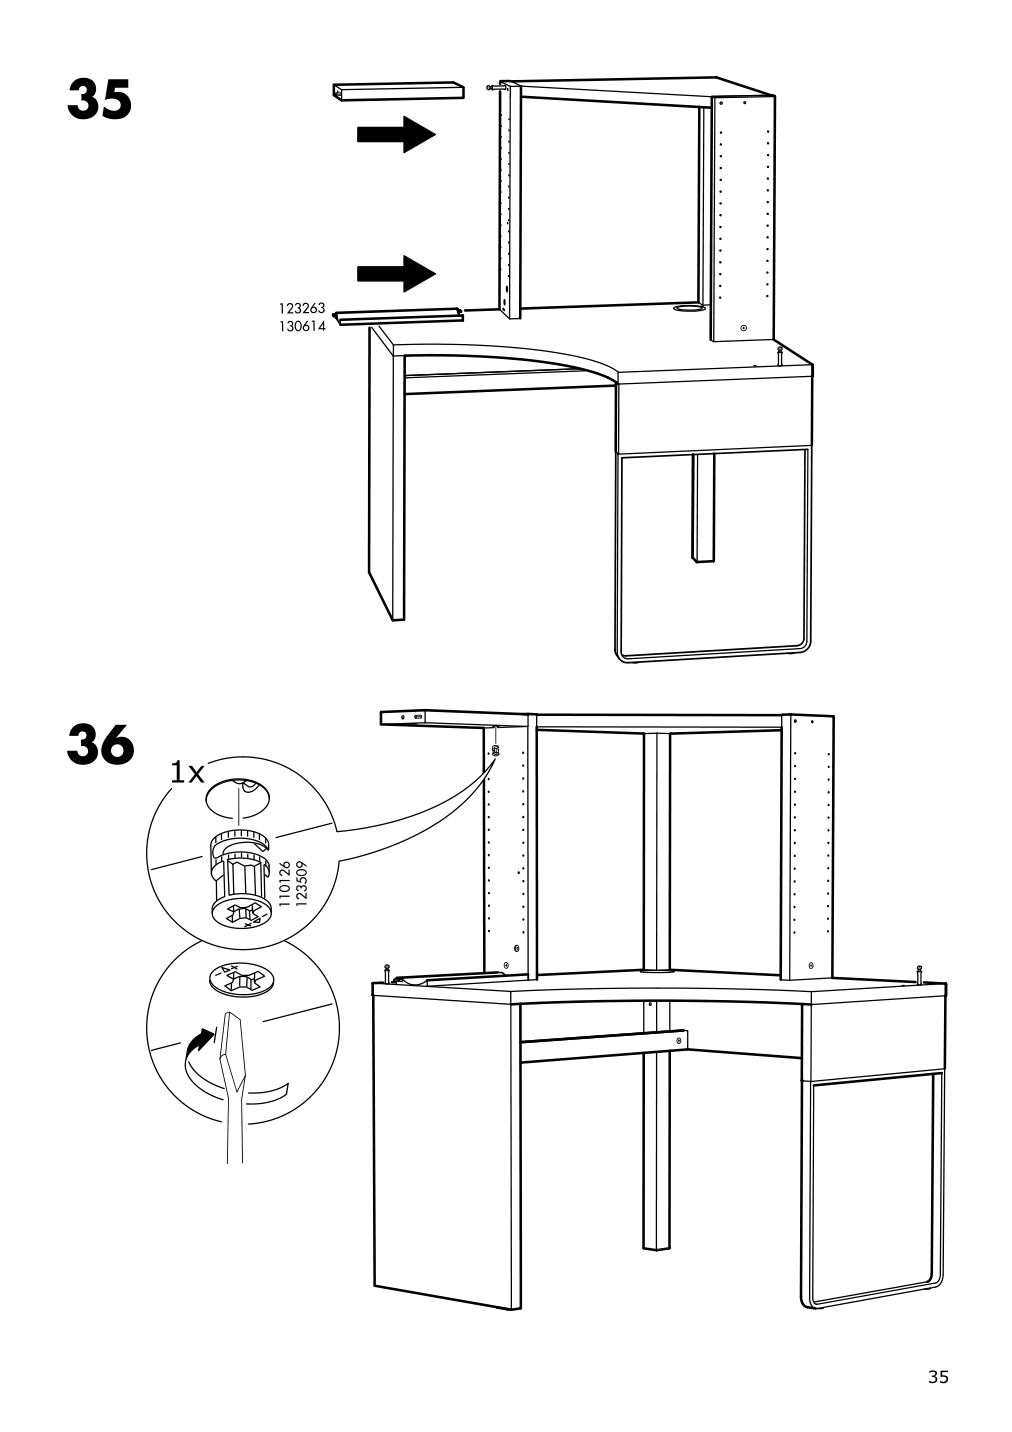
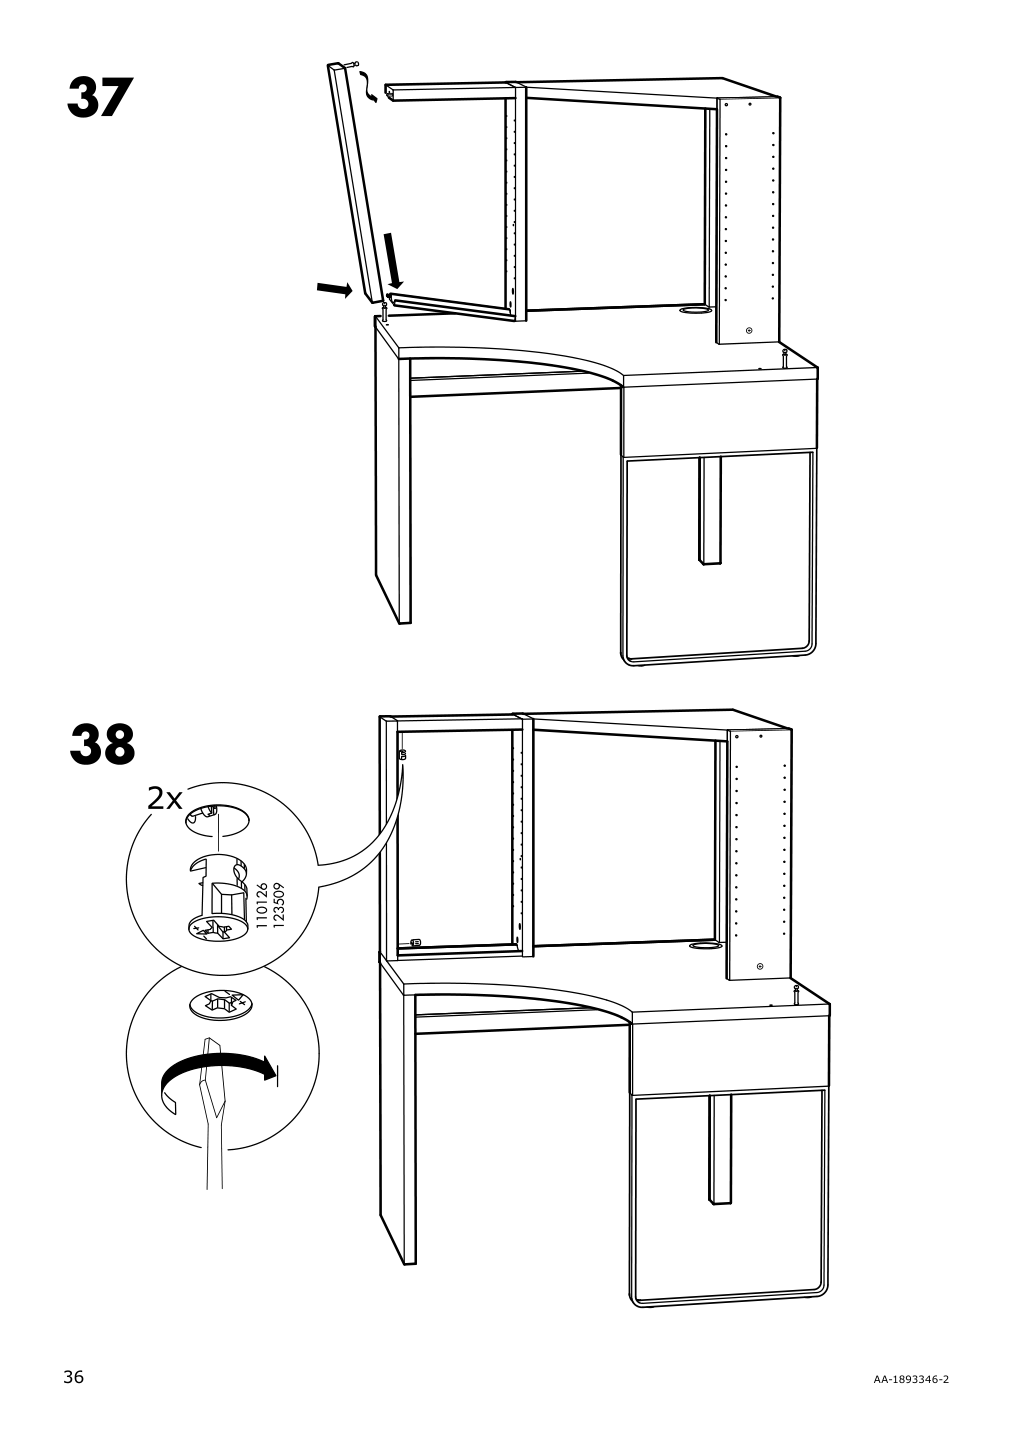
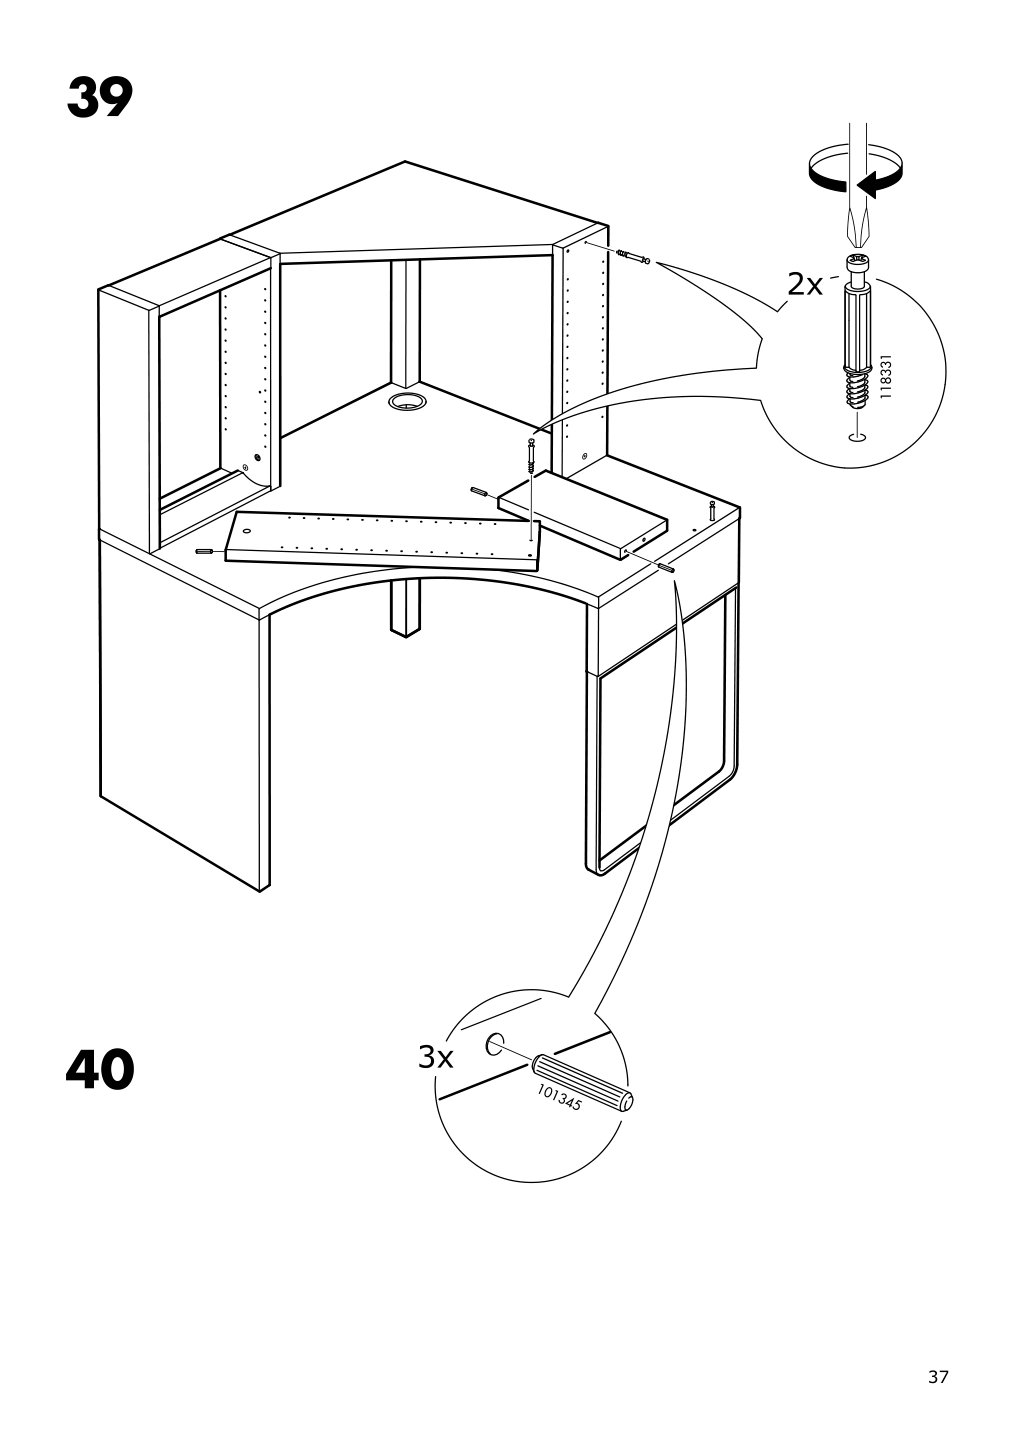
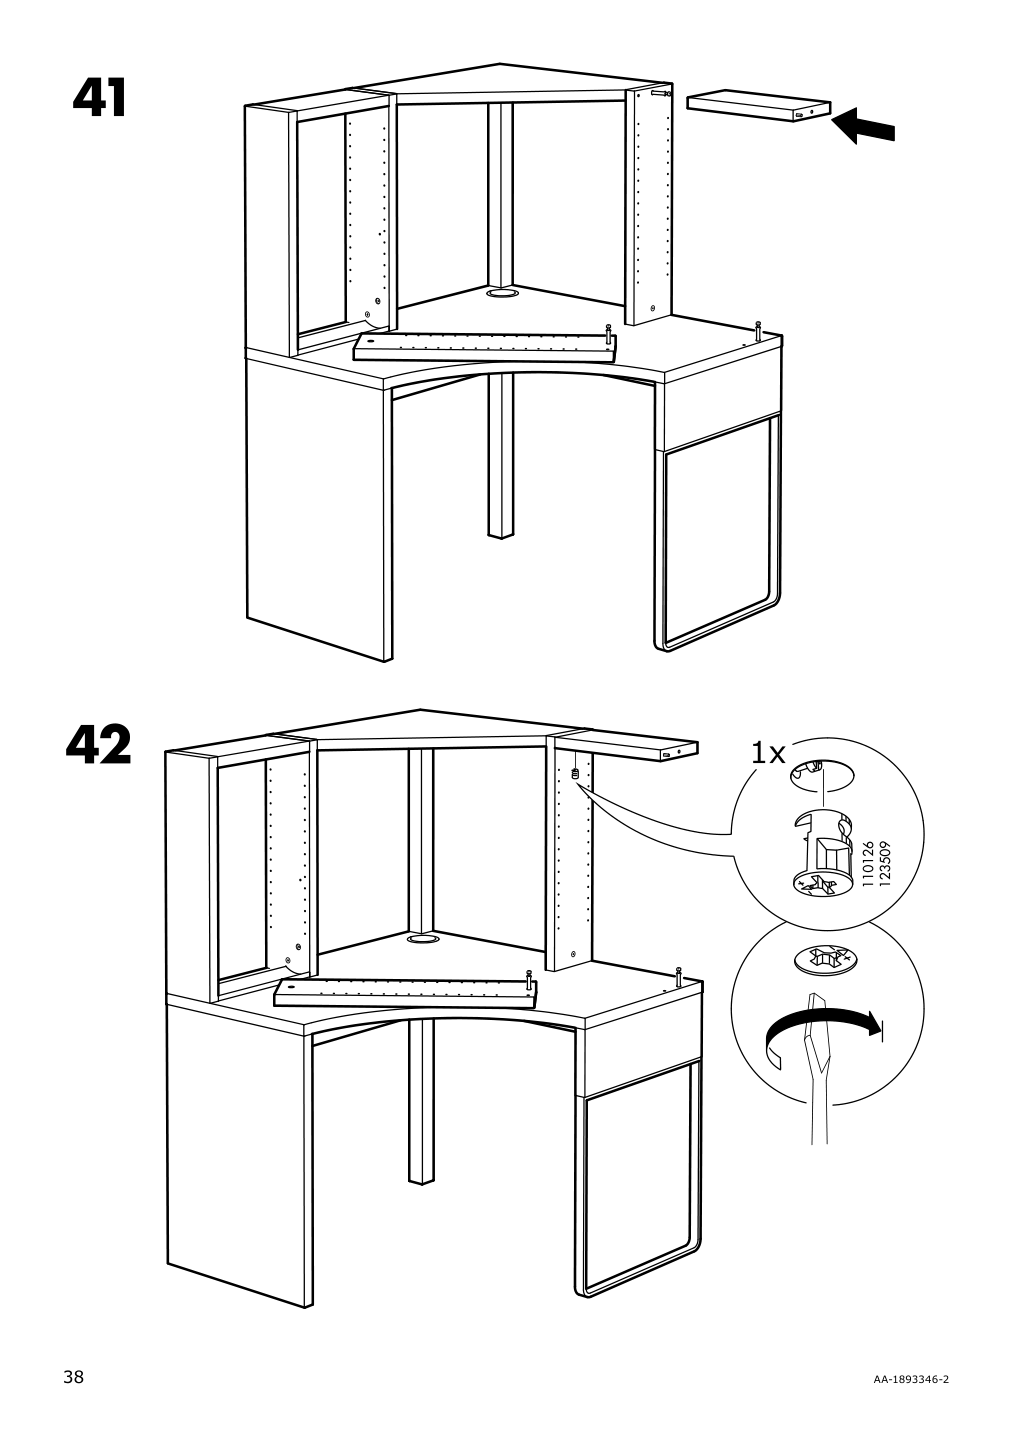
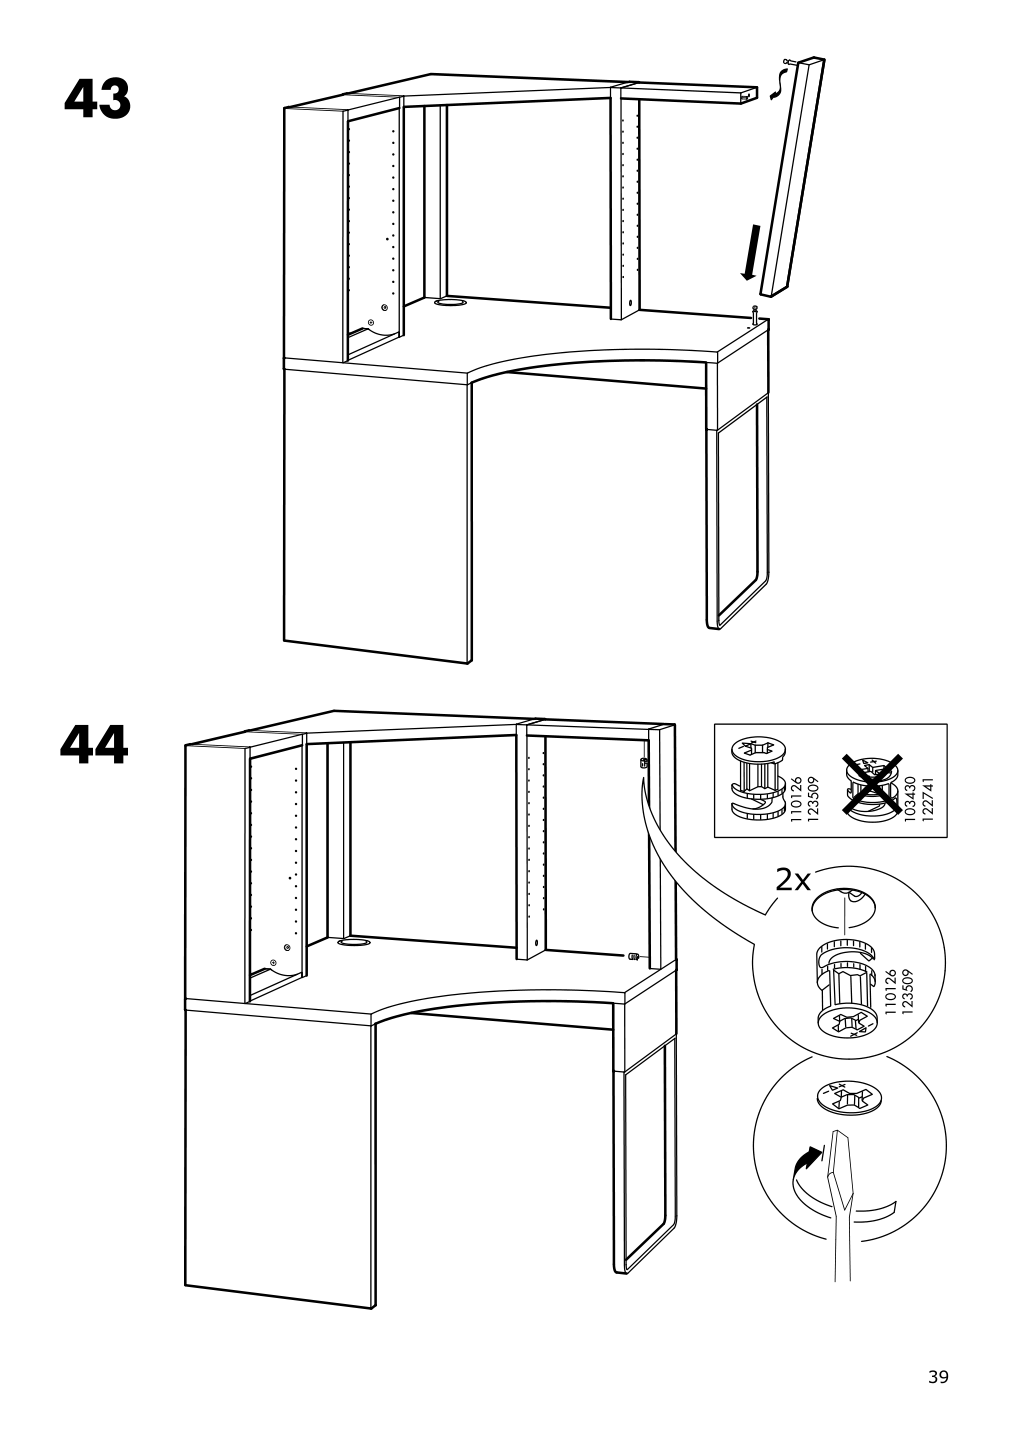
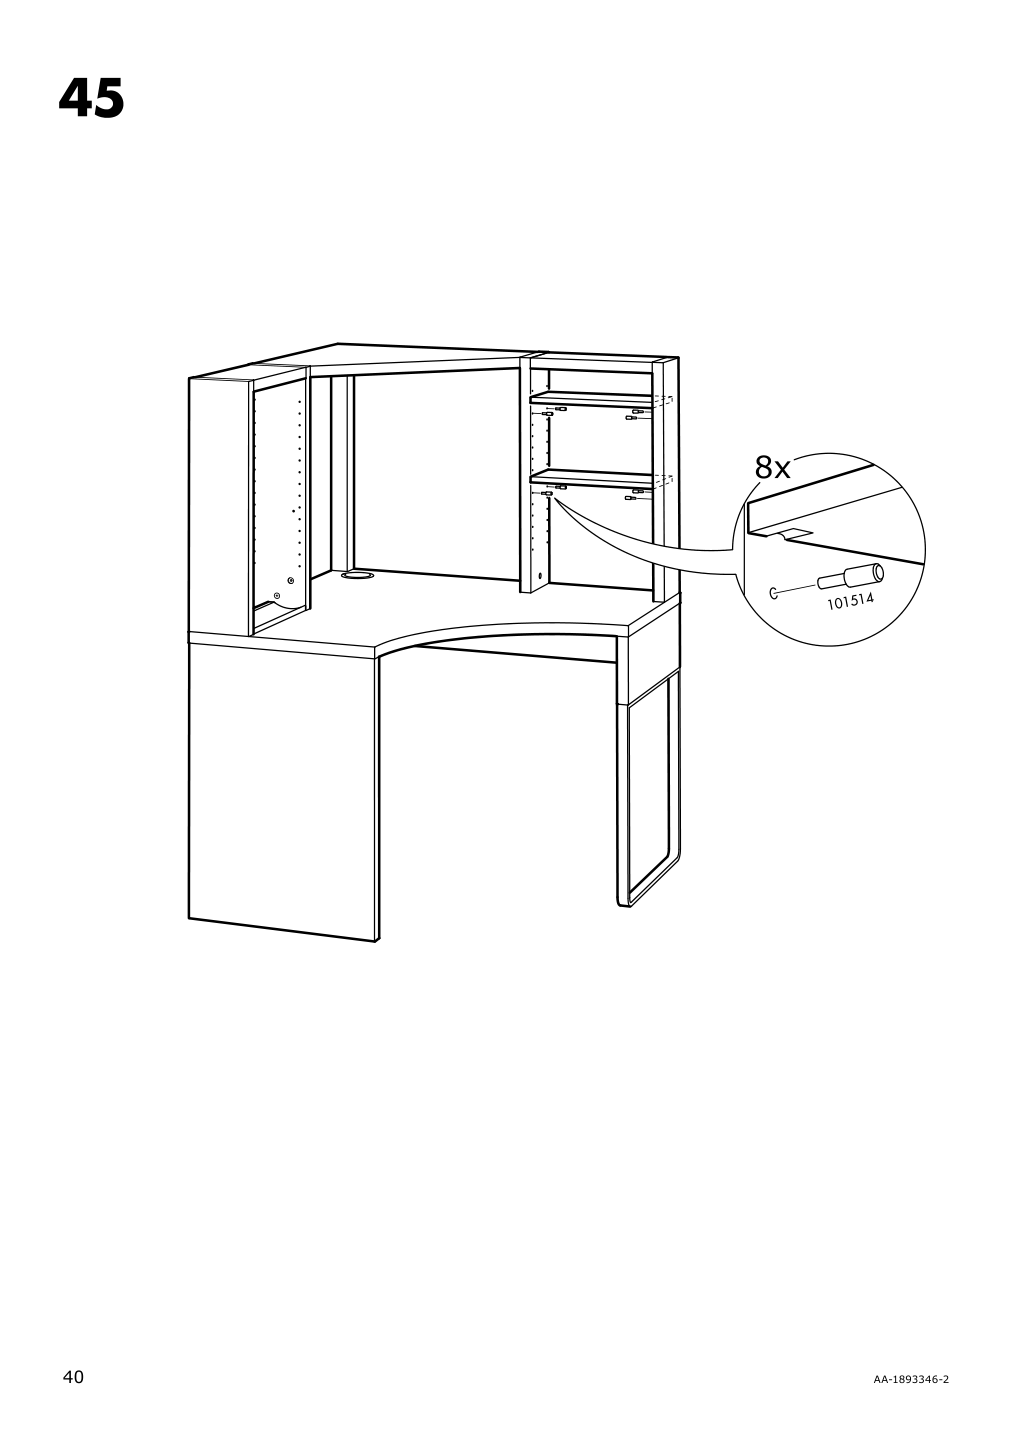
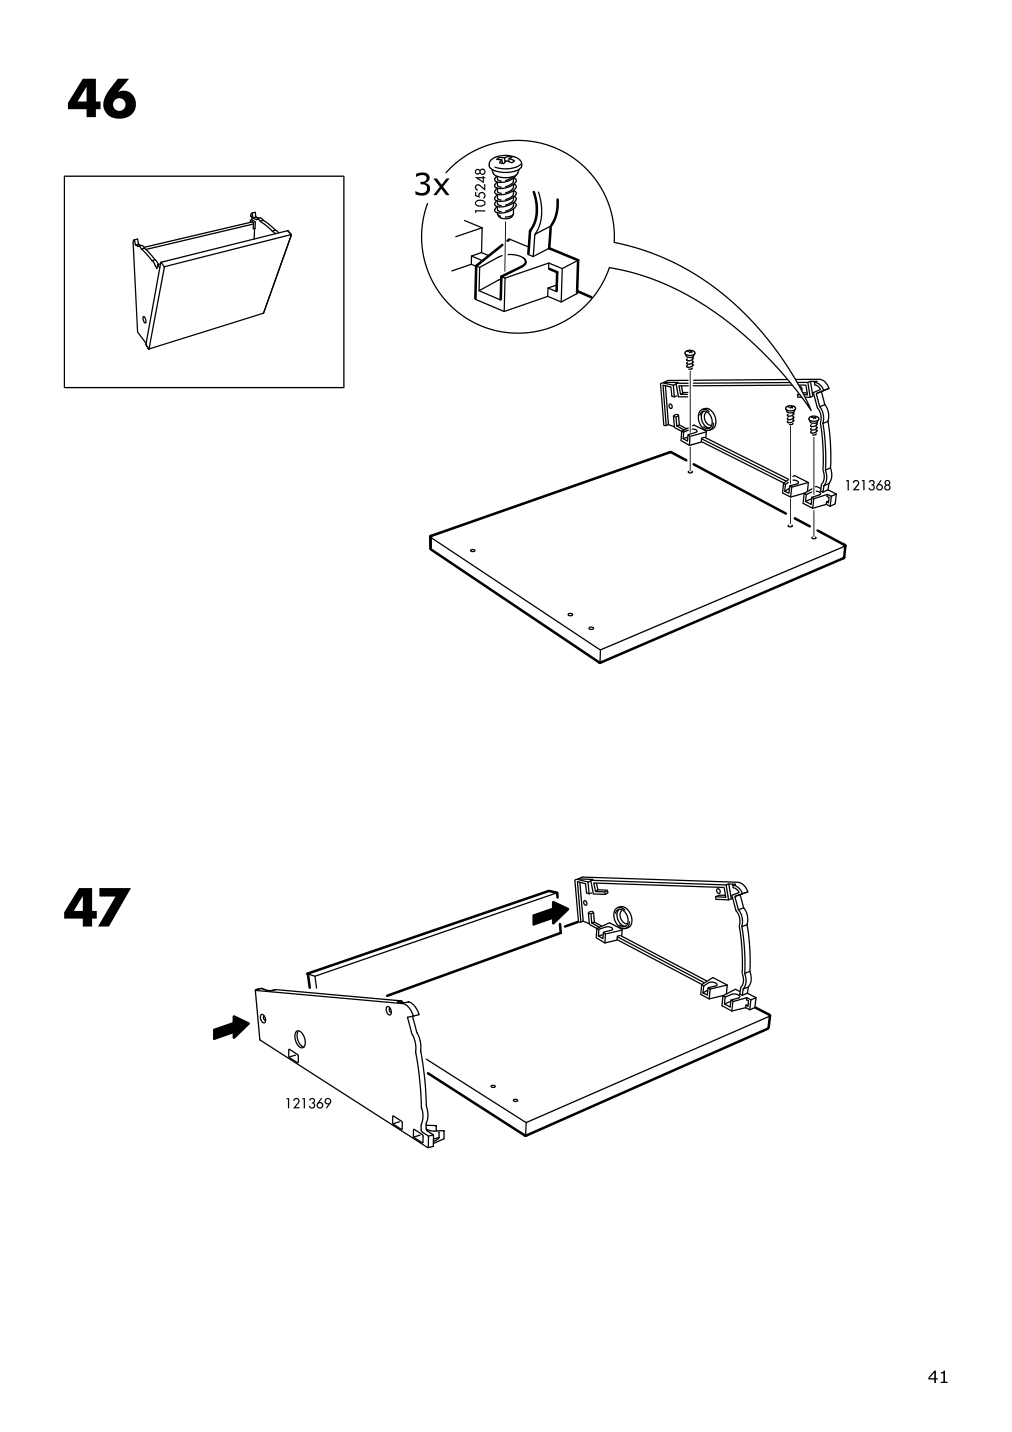
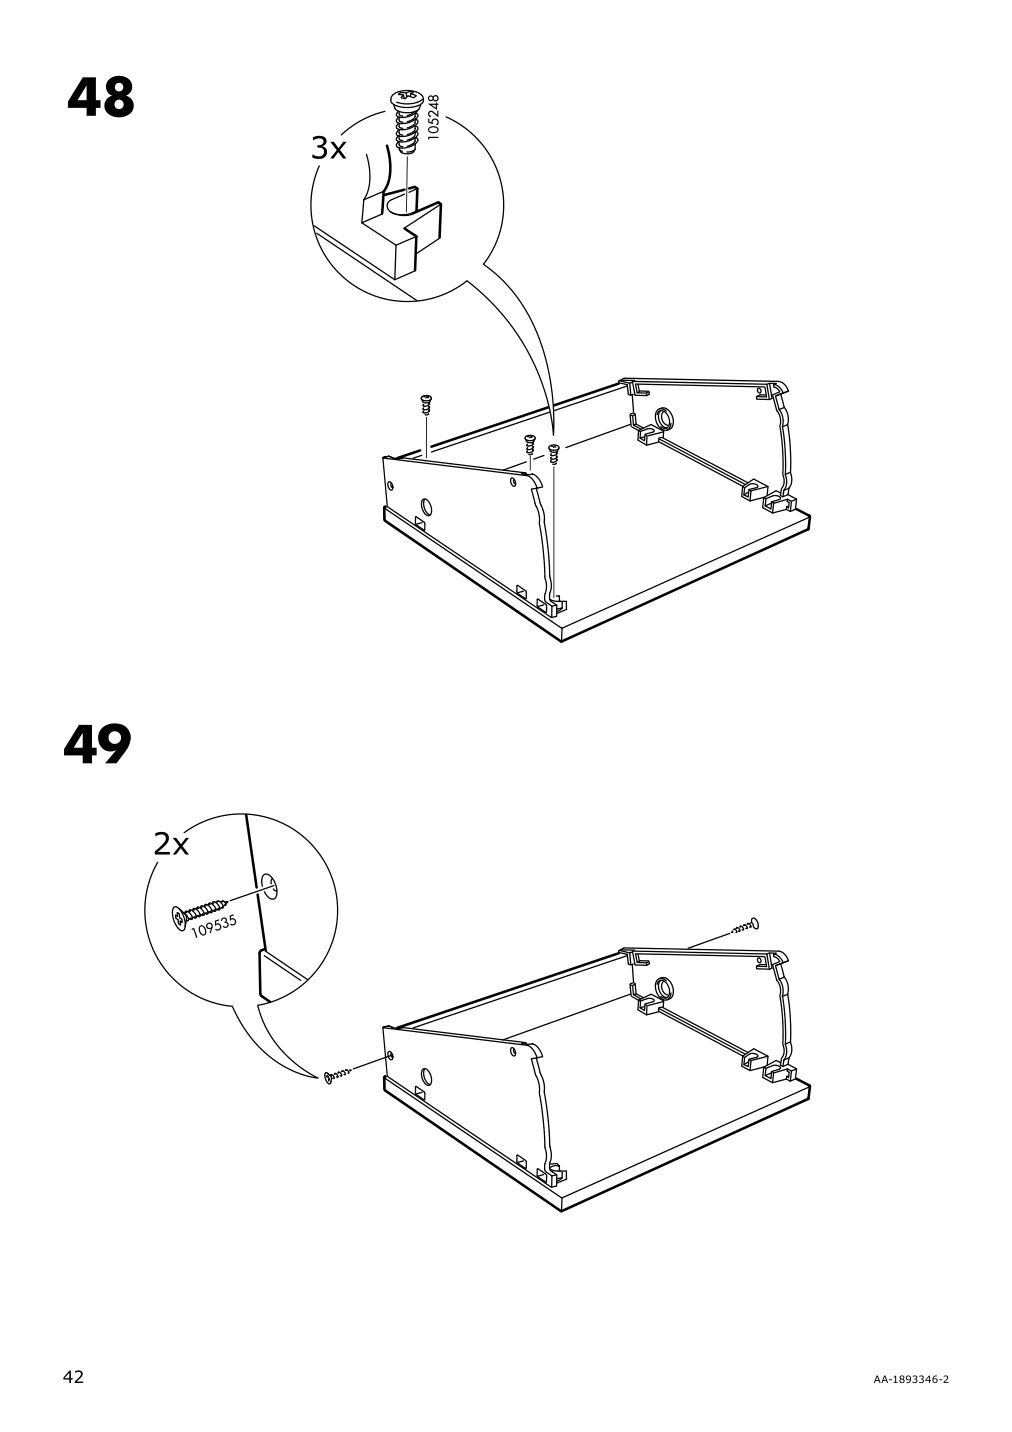
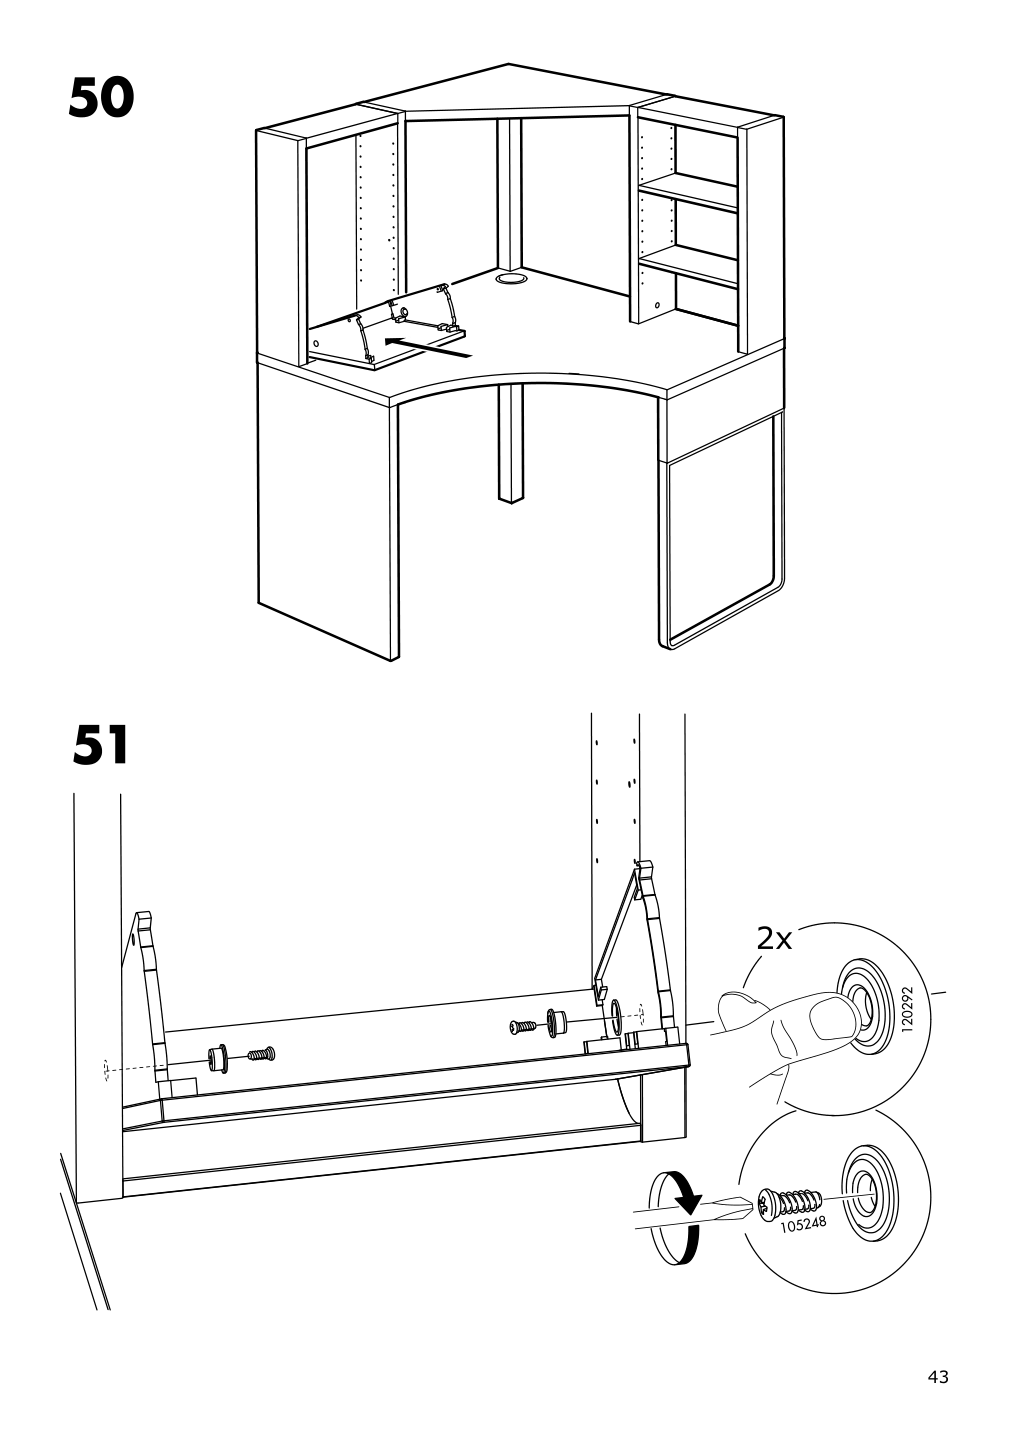
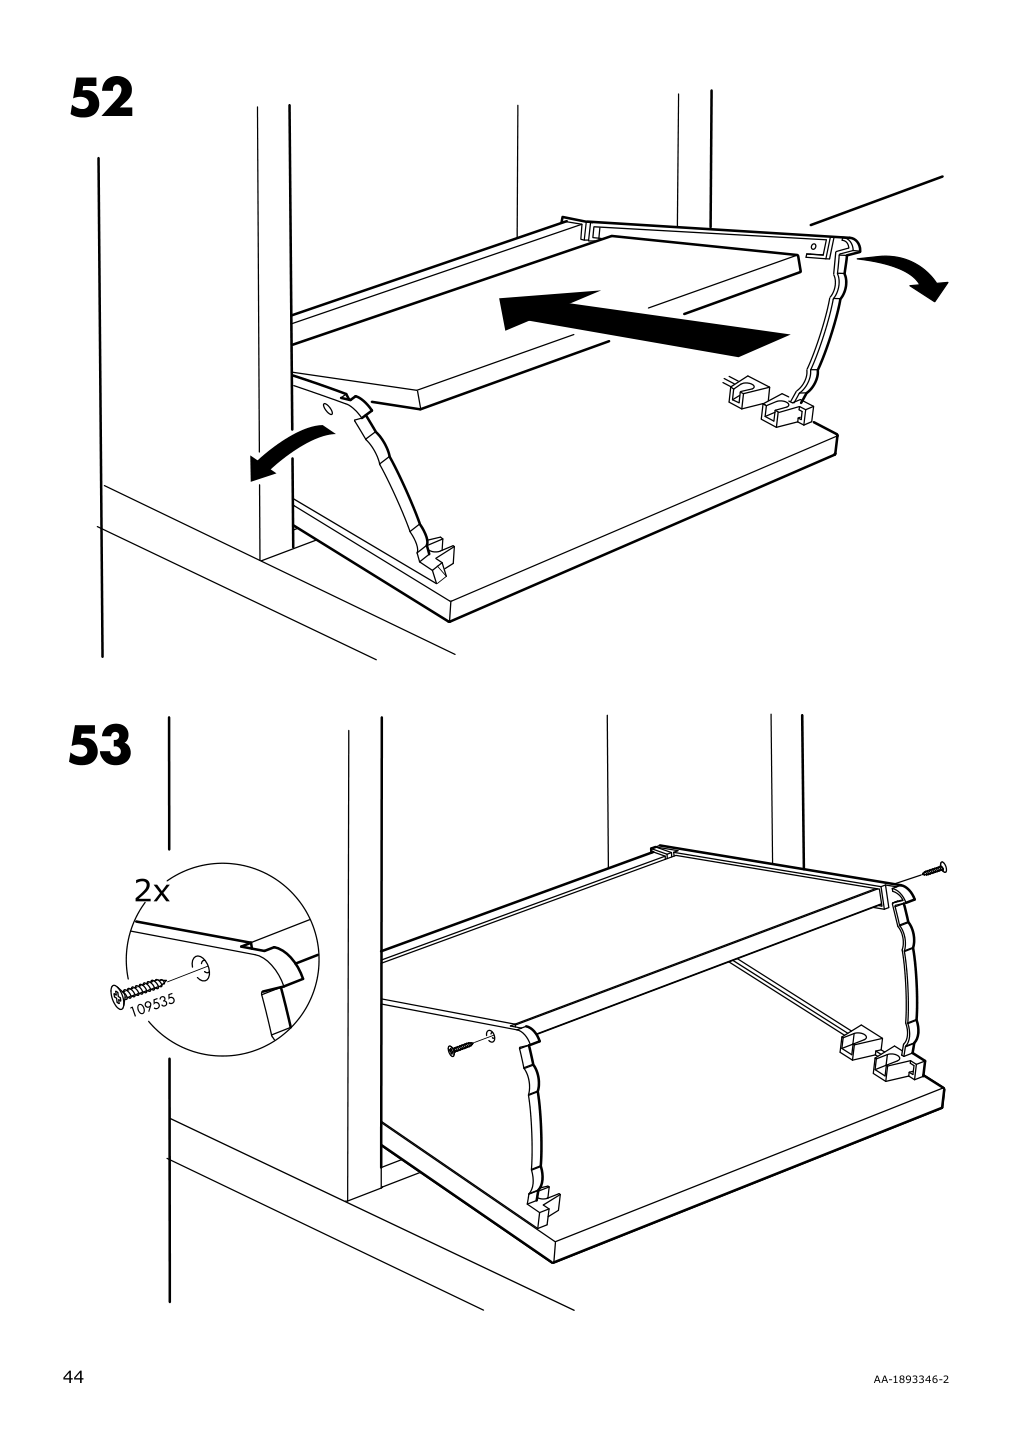
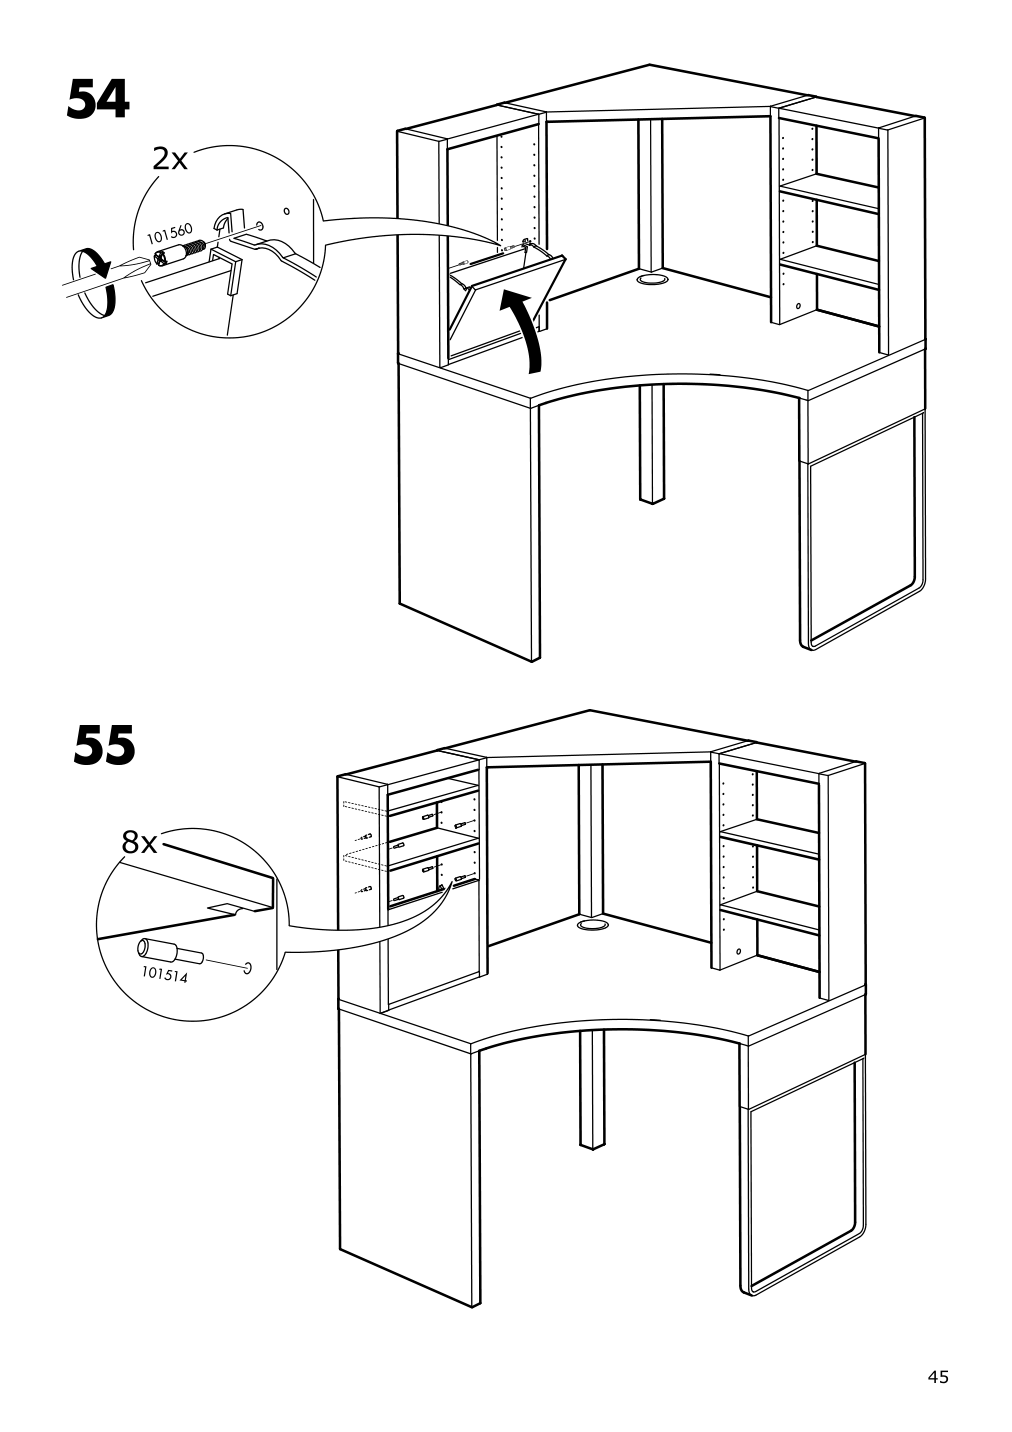
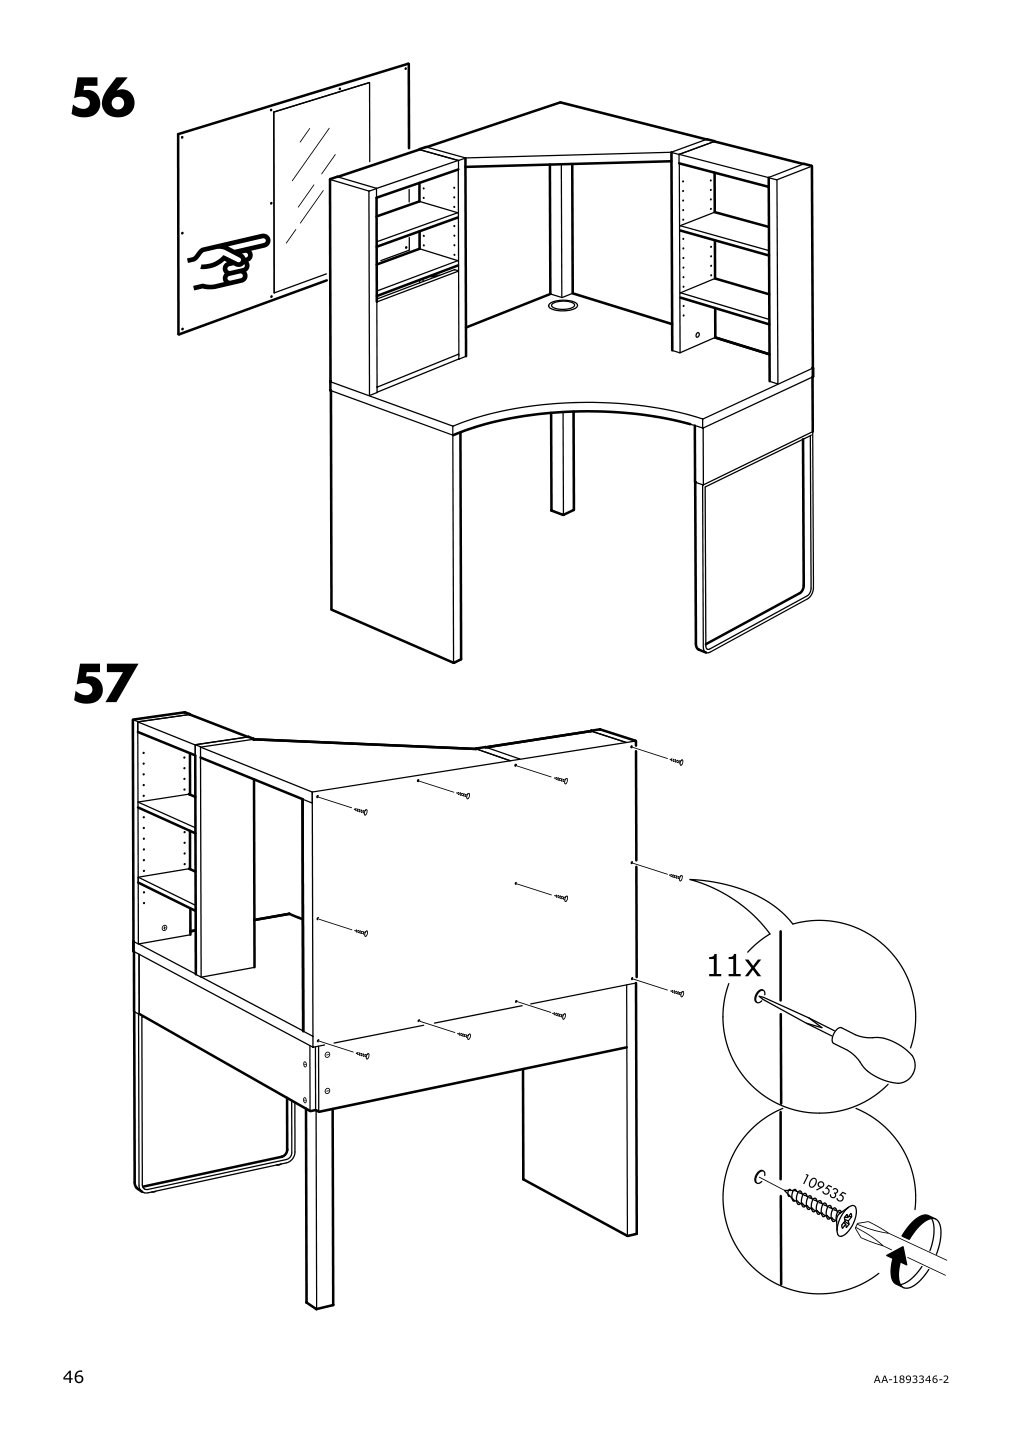
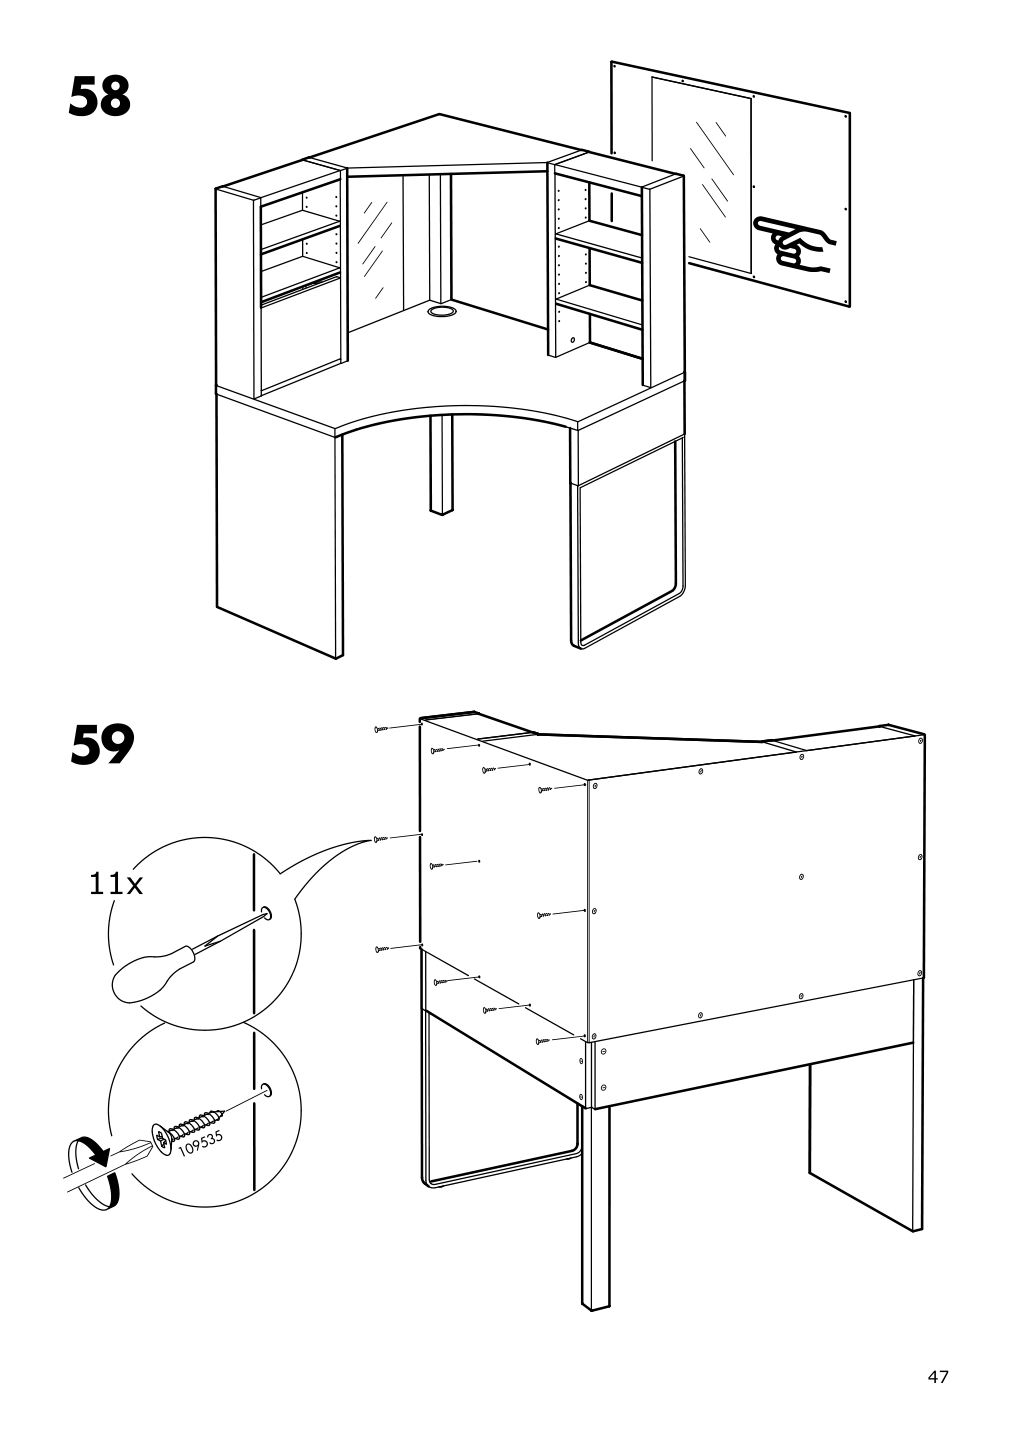
There is one assembly instruction manual to fully build IKEA MICKE corner workstation.
IKEA MICKE Product Details
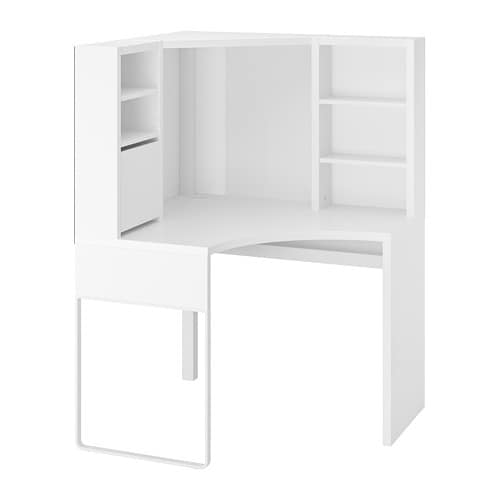
MICKE Corner workstation, white, 39 3/8x55 7/8 "
Article number: 502.507.13
You can keep your desk clear of paper by writing your notes on the magnetic board on the back panel. Or attaching your to-do lists there with a magnet.
You can adjust the shelves to fit different things, and adjust them again whenever you need to. Adjustable shelves help you use your space more efficiently.
It’s easy to keep cords and cables out of sight but close at hand with the cable outlet at the back.
You can mount the legs to the right or left, according to your space or preference.
You can extend your work surface by combining desks and drawer units. All desks and drawer units in the MICKE series are the same height.
Maximize the space at home with this corner workstation. Lots of easily accessible storage even though the desk is neat. Cable outlet, adjustable shelves and a magnetic board for notes are smart solutions.
Measurements:
Max. width: 39 3/8 " (100 cm)Depth: 39 3/8 " (100 cm)
Height: 55 7/8 " (142 cm)
Need help?
Have a question about IKEA MICKE or Need to request a missing manual?
Questions and Answers
Number of questions: 1
Joseph Hernandez
Posted on May 29, 2023I'm trying to assemble my Micke corner workstation and I'm having trouble fitting the shelves. The instructions are a bit unclear, can you please provide more detailed steps on how to adjust the shelves?
Kenzo @ EasyRebuild
Answered on May 31, 2023To adjust the shelves on the MICKE corner workstation:
1. Identify the shelf pins that are pre-installed on the side panels. These pins will allow you to position the shelves at different heights.
2. Decide where you want to place the shelves. The side panels have multiple pre-drilled holes to accommodate different shelf positions.
3. Gently push the shelf pins into the desired holes on the side panels. Make sure the pins are securely in place.
4. Place the shelves onto the pins. Ensure the shelves are level and stable.
5. You can adjust the shelf positions at any time by simply repositioning the shelf pins and moving the shelves accordingly.
Remember to evenly distribute the weight on the shelves to prevent them from sagging. If you need any clarification, refer back to the instruction manual or contact IKEA customer service for further assistance


