IKEA SKRUVBY coffee table instructions
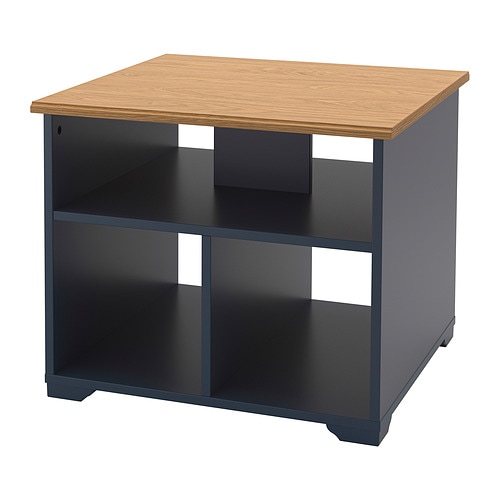
Full Product Name: IKEA SKRUVBY Coffee table, black-blue, 23 5/8x23 5/8 "
Article Number: 705.319.82
Number of user manuals: 1
Manuals and Parts List
There is one assembly instruction manual to fully build IKEA SKRUVBY coffee table.
IKEA SKRUVBY Product Details

SKRUVBY Coffee table, black-blue, 23 5/8x23 5/8 "
Article number: 705.319.82
The furniture in the SKRUVBY series is designed to go well together. Combine and match them as you like or use each piece of furniture as a beautiful solitaire.
The table has plenty of open storage space and you can easily personalize and adapt it by filling it with personal items or with practical boxes.
The table top's oak expression creates a warm and natural feel.
The attention to detail, like the feet and profiled edges of the table top, give the furniture an expressive look and adds to the traditional style.
Easier to assemble thanks to the clever wedge dowels that are simple to press into the pre-drilled holes and expand when tightened.
The SKRUVBY series has a traditional look with solitaire pieces of furniture that can be coordinated. Look at this coffee table as a blank canvas, add open and closed storage and create your artwork!
Measurements:
Height under furniture: 3/4 " (2 cm)Height: 19 5/8 " (50 cm)
Length: 23 5/8 " (60 cm)
Max. load: 44 lb (20 kg)
Max load/shelf: 22 lb (10 kg)
Width: 23 5/8 " (60 cm)
Need help?
Have a question about IKEA SKRUVBY or Need to request a missing manual?
Questions and Answers
Number of questions: 1
Peter
Posted on Sep 25, 2022I'm having trouble assembling the coffee table. The wedge dowels don't seem to be fitting properly into the pre-drilled holes. Is there a specific order or technique I should use when inserting them?
Peter
Alice @ EasyRebuild
Answered on Sep 27, 2022The wedge dowels can be tricky to insert properly. Here are the steps to ensure they fit correctly:
1. Make sure the pre-drilled holes in the table top and legs are aligned correctly before attempting to insert the dowels.
2. Apply a small amount of wood glue into the pre-drilled holes before inserting the dowels. This will help them grip better.
3. Gently tap the dowels into the holes using a rubber mallet or the flat side of a hammer. Do not force them in, as this can damage the holes.
4. Once the dowels are partially inserted, use a screwdriver or other tool to fully expand and lock them in place by turning them clockwise.
Take your time and double-check the alignment. With a little patience, the wedge dowels should fit snugly and securely. Let me know if you have any other questions


