IKEA MITTCIRKEL / TILLSLAG desk instructions
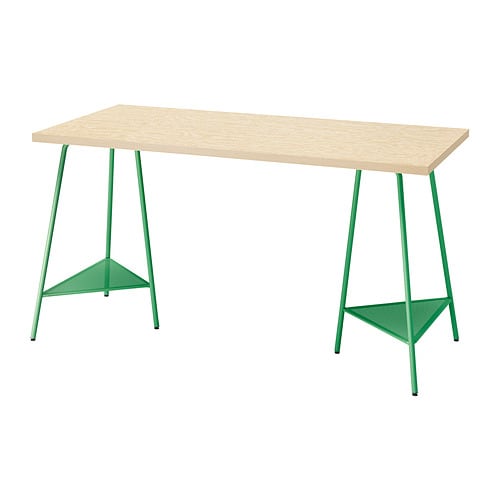
Full Product Name: IKEA MITTCIRKEL / TILLSLAG Desk, lively pine effect/green, 55 1/8x23 5/8 "
Article Number: 395.087.57
Number of user manuals: 1
Manuals and Parts List
There is one assembly instruction manual to fully build IKEA MITTCIRKEL / TILLSLAG desk.
IKEA MITTCIRKEL / TILLSLAG Product Details

MITTCIRKEL / TILLSLAG Desk, lively pine effect/green, 55 1/8x23 5/8 "
Article number: 395.087.57
The plywood-patterned edge band adds to the quality feel.
The tabletop has pre-drilled holes to make it easier to attach to the underframe.
The table top is made of board-on-frame, a strong and lightweight material.
Creating a desk that suits you and your space is simple. Mix and match your choice of table top and legs – or choose this ready-made combination with a pine-like top.
Measurements:
Length: 55 1/8 " (140 cm)Width: 23 5/8 " (60 cm)
Height: 28 3/4 " (73 cm)
Need help?
Have a question about IKEA MITTCIRKEL / TILLSLAG or Need to request a missing manual?
Questions and Answers
Number of questions: 2
Sanders Gary
Posted on Apr 30, 2023I'd like to know if it's possible to replace the legs of this desk with different ones, such as those from a different MITTCIRKEL / TILLSLAG combination. If so, are there any specific requirements or recommendations for doing so?
Emily
Posted on Oct 03, 2022I am having trouble attaching the legs to the table top, can you provide a step-by-step guide on how to assemble this desk?
Kenzo @ EasyRebuild
Answered on Oct 05, 2022To attach the legs to the table top, follow these steps:
1. Locate the pre-drilled holes on the underside of the table top. These are designed to make the leg attachment process easier.
2. Position one of the legs so that the screw holes on the leg align with the pre-drilled holes on the table top.
3. Insert the screws provided through the leg and into the pre-drilled holes, securing the leg in place. Do not fully tighten the screws yet.
4. Repeat step 3 for the remaining legs, ensuring they are all aligned properly before fully tightening the screws.
5. Once all four legs are attached, go back and fully tighten all the screws to secure the legs in place.
6. Double-check that all connections are tight and the desk is stable before use.
Let me know if you have any other questions


