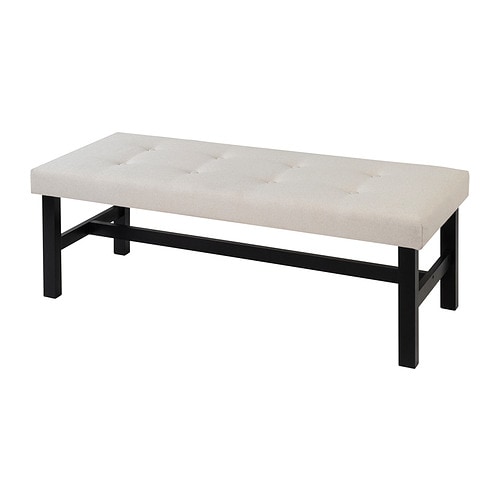
IKEA DALHOLEN bench instructions
Full Product Name: IKEA DALHOLEN Bench, beige/black-brown, 44 1/8 "
Article Number: 805.651.46
Number of user manuals: 1
Manuals and Parts List
There is one assembly instruction manual to fully build IKEA DALHOLEN bench.
IKEA DALHOLEN Product Details

DALHOLEN Bench, beige/black-brown, 44 1/8 "
Article number: 805.651.46
The solid wooden legs are strong and sturdy – and complement the classic design.
Tall legs make cleaning easy.
10-year Limited Warranty. Read about the terms in the Limited Warranty brochure.
Measurements:
Depth: 17 3/4 " (45 cm)Height: 15 3/4 " (40 cm)
Width: 44 1/8 " (112 cm)
Need help?
Have a question about IKEA DALHOLEN or Need to request a missing manual?
Questions and Answers
Number of questions: 2
Andrea Martinez
Posted on Aug 02, 2023I have a DALHOLEN bench that is no longer in the original condition. The legs are loose and I'm worried about them falling off. What can I do to fix this?
Andrea
Kenzo @ EasyRebuild
Answered on Aug 04, 2023To fix the loose legs on your DALHOLEN bench, you'll want to tighten the screws that connect the legs to the seat. First, turn the bench over and locate the screws at the base of each leg. Using a screwdriver, tighten the screws firmly to secure the legs. Be careful not to overtighten, as this could strip the screw holes. If the screw holes have become enlarged, you may need to use wood glue or dowels to reinforce them before retightening the screws. With a little care, you should be able to get your DALHOLEN bench back to its original sturdy condition
Daniels Benjamin
Posted on Jul 20, 2023I'm having trouble assembling the DALHOLEN bench. The legs won't fit properly into the base. What is the correct procedure for attaching the legs to the base?
Daniels Benjamin
Alice @ EasyRebuild
Answered on Jul 22, 2023To attach the legs to the base of the DALHOLEN bench, first ensure that all the necessary hardware is present. The legs should have pre-drilled holes that align with the mounting points on the base. Gently insert the legs into the base, taking care to line up the holes. Use the provided screws and tighten them securely, but do not overtighten. If the legs still do not fit properly, double-check that all the holes are aligned correctly. Applying a small amount of wood glue to the leg joints can also help create a stronger, more secure connection


