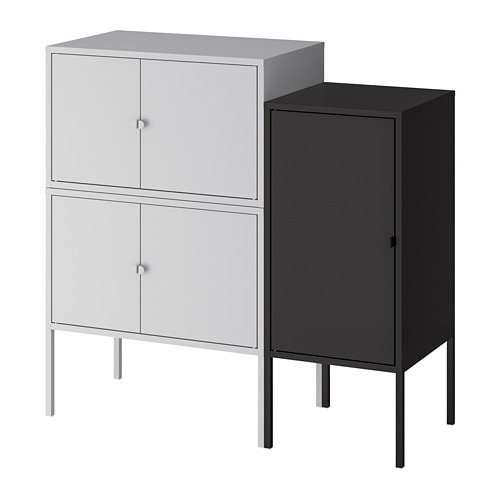
IKEA LIXHULT storage combination instructions
Full Product Name: IKEA LIXHULT Storage combination, gray/anthracite, 37 3/8x13 3/4x36 1/4 "
Article Number: 093.883.65
Number of user manuals: 2
Manuals and Parts List
There are 2 assembly instruction manuals to fully build IKEA LIXHULT storage combination. Scroll down to view all.
1. Instructions for IKEA Lixhult cabinet metal anthracite


IKEA LIXHULT Product Details

LIXHULT Storage combination, gray/anthracite, 37 3/8x13 3/4x36 1/4 "
Article number: 093.883.65
Keep track of important papers, letters and newspapers by sorting them on the inside of the cabinet door.
The cabinet can be used either with the included legs or be placed on the floor.
Helps you keep track of small items like chargers, keys and wallets, or more bulky items like handbags and toys.
Everything you need for storing and keeping things organized at home. Choose a ready-made combination or create your own, adapted to your style and belongings. This is just one of many, many possibilities.
Measurements:
Height without legs: 27 1/2 " (70 cm)Height with legs: 36 1/4 " (92 cm)
Width: 37 3/8 " (95 cm)
Depth: 13 3/4 " (35 cm)
Height: 36 1/4 " (92 cm)
Height under furniture: 8 1/4 " (21 cm)
Max load/shelf: 423.3 oz (12.00 kg)
Need help?
Have a question about IKEA LIXHULT or Need to request a missing manual?
Questions and Answers
Number of questions: 1
Rebecca
Posted on Aug 31, 2023I've assembled the LIXHULT storage combination but I'm having trouble figuring out how to attach the legs to the cabinet. Can you please provide instructions or a link to a video that shows how it's done?
Alice @ EasyRebuild
Answered on Sep 02, 2023To attach the legs to the LIXHULT storage combination cabinet:
1. Locate the four metal legs that came with the product.
2. Align each leg with the pre-drilled holes on the bottom of the cabinet.
3. Insert the screws provided through the holes in the legs and into the cabinet.
4. Tighten the screws securely using a screwdriver.
5. Make sure all four legs are firmly attached before placing the cabinet in its final location.
If you need a visual guide, IKEA has an assembly video available on their website that demonstrates this step-by-step. Let me know if you have any other questions


