IKEA BESTÅ wall-mounted cabinet combination instructions
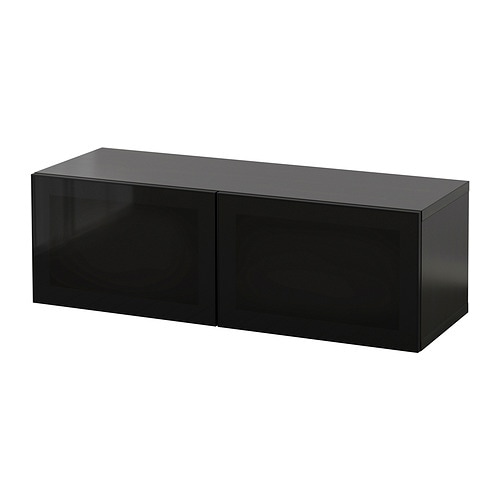
Full Product Name: IKEA BESTÅ Wall-mounted cabinet combination, black-brown Glassvik/black smoked glass, 47 1/4x16 1/2x15 "
Article Number: 994.410.85
Number of user manuals: 4
Manuals and Parts List
There are 4 assembly instruction manuals to fully build IKEA BESTÅ wall-mounted cabinet combination. Scroll down to view all.
1. Instructions for IKEA Besta frame black brown


2. Instructions for IKEA Besta soft closing push open hinge


3. Instructions for IKEA Besta suspension rail silver color


IKEA BESTÅ Product Details

BESTÅ Wall-mounted cabinet combination, black-brown Glassvik/black smoked glass, 47 1/4x16 1/2x15 "
Article number: 994.410.85
A simple unit can be enough storage for a limited space or the foundation for a larger storage solution if your needs change.
Everything you need for storing and keeping things organized at home. Choose a ready-made combination or create your own, adapted to your style and belongings. This is just one of many, many possibilities.
Measurements:
Width: 47 1/4 " (120 cm)Depth: 16 1/2 " (42 cm)
Height: 15 " (38 cm)
Need help?
Have a question about IKEA BESTÅ or Need to request a missing manual?
Questions and Answers
Number of questions: 1
Hardy Jeffrey
Posted on Jun 21, 2023I'm having trouble with the doors not closing properly on my Bestå cabinet. The doors seem to be slightly misaligned and catch on each other when I try to shut them. What is the recommended adjustment method for the door alignment?
Kenzo @ EasyRebuild
Answered on Jun 23, 2023To adjust the door alignment on your BESTÅ wall-mounted cabinet, follow these steps:
1. First, check if the cabinet is level. Use a spirit level to ensure it's installed straight on the wall. If not, adjust the wall mounting brackets accordingly.
2. Locate the adjustment screws on the hinges of the doors. There are typically two screws - one for adjusting the door up/down and the other for in/out.
3. Using a screwdriver, turn the adjustment screws slowly to shift the door position. Turn the screws clockwise to move the door inward, and counterclockwise to move it outward.
4. Make small adjustments, testing the door closure after each turn of the screws. Continue adjusting until the doors align properly and close smoothly without catching on each other.
5. Once the alignment is correct, ensure all screws are tightened securely to maintain the adjusted position.
Let me know if you have any other questions


