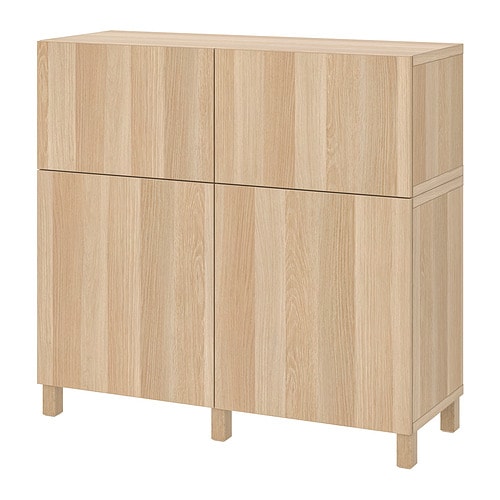
IKEA BESTÅ storage combination w doors/drawers instructions
Full Product Name: IKEA BESTÅ Storage combination w doors/drawers
Article Number: 294.818.43
Number of user manuals: 8
Table of Contents
-
❯ Manuals
and Parts List
- ► IKEA Besta drawer frame white stained oak effect
- ► IKEA Besta drawer runner soft closing
- ► IKEA Besta frame white stained oak effect
- ► IKEA Besta frame white stained oak effect
- ► IKEA Besta shelf white stained oak effect
- ► IKEA Besta soft closing push open hinge
- ► IKEA Lappviken door drawer front white stained oak effect
- ► IKEA Stubbarp leg white stained oak effect
- ❯ Product Detail Specification
- ❯ Related Products
- ❯ Question and Answer
Manuals and Parts List
There are 8 assembly instruction manuals to fully build IKEA BESTÅ storage combination w doors/drawers. Scroll down to view all.
1. Instructions for IKEA Besta drawer frame white stained oak effect


2. Instructions for IKEA Besta drawer runner soft closing


3. Instructions for IKEA Besta frame white stained oak effect


4. Instructions for IKEA Besta frame white stained oak effect


5. Instructions for IKEA Besta shelf white stained oak effect


6. Instructions for IKEA Besta soft closing push open hinge


7. Instructions for IKEA Lappviken door drawer front white stained oak effect


IKEA BESTÅ Product Details

BESTÅ Storage combination w doors/drawers
Article number: 294.818.43
Need help?
Have a question about IKEA BESTÅ or Need to request a missing manual?
Questions and Answers
Number of questions: 3
Douglas Logan
Posted on Jul 14, 2023I'm interested in installing a BESTÅ storage combination with doors and drawers. Can you provide guidance on the correct installation procedure and any specific tools required to ensure proper alignment and adjustment of the components?
Kenzo @ EasyRebuild
Answered on Jul 16, 2023To install the BESTÅ storage combination with doors and drawers, you'll need a Phillips screwdriver, a hammer, and a rubber mallet. Start by laying out all the components and hardware. Carefully follow the step-by-step instructions in the assembly guide. Pay close attention to the order of assembly and ensure all screws are tightened securely. For the doors and drawers, adjust the hinges and runners to ensure smooth and even operation. Use the hammer and rubber mallet to gently tap the components into place if needed. Test the functionality of the doors and drawers, and make any necessary adjustments to the hinges and runners. With the right tools and careful assembly, you can successfully install the BESTÅ storage combination
Cynthia
Posted on Nov 11, 2022How do I adjust the height of the BESTÅ storage unit to fit my specific needs? Specifically, I'm having trouble getting it to align properly with my wall
Alice @ EasyRebuild
Answered on Nov 13, 2022To adjust the height of the BESTÅ storage unit, you can follow these steps:
1. Locate the adjustable feet at the bottom of the unit. These feet can be turned clockwise or counterclockwise to raise or lower the unit.
2. Use a screwdriver or wrench to turn the feet as needed to achieve the desired height and alignment with your wall.
3. Once the unit is at the correct height, ensure that all the feet are firmly in contact with the floor to provide stability.
4. If the unit still doesn't align properly with your wall, you may need to shim under the feet to level it out.
Remember to adjust the feet evenly on all sides to keep the unit level and stable
Dominic
Posted on Oct 26, 2022What are the recommended installation procedures for the BESTÅ storage combination with doors and drawers?
Dominic
Alice @ EasyRebuild
Answered on Oct 28, 2022To install the BESTÅ storage combination with doors and drawers:
1. Carefully unpack all the components and hardware included in the package.
2. Refer to the instruction manual and identify all the necessary parts.
3. Assemble the frame following the step-by-step instructions.
4. Attach the hinges to the doors and install the doors onto the frame.
5. Install the drawers by sliding them into the appropriate openings.
6. Secure the entire unit to the wall using the provided wall anchors for stability.
7. Adjust the doors and drawers as needed to ensure proper alignment and smooth operation.
8. Finally, organize the interior as desired using the included shelves, dividers, or other accessories.
Take your time and follow the instructions carefully for a successful installation


