IKEA BESTÅ shelf unit with doors instructions
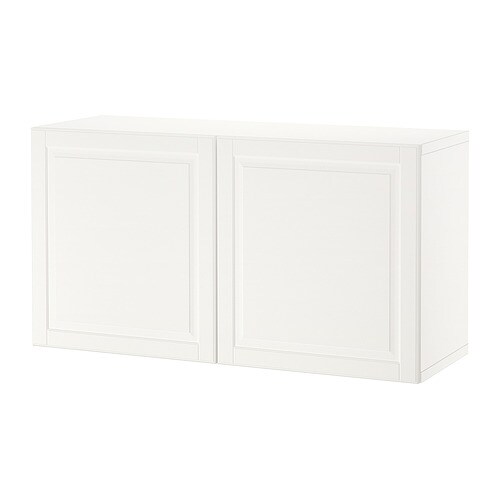
Full Product Name: IKEA BESTÅ Shelf unit with doors, white/Smeviken white, 47 1/4x16 1/2x25 1/4 "
Article Number: 094.251.55
Number of user manuals: 3
Manuals and Parts List
There are 3 assembly instruction manuals to fully build IKEA BESTÅ shelf unit with doors. Scroll down to view all.
1. Instructions for IKEA Besta frame white


2. Instructions for IKEA Besta shelf white


IKEA BESTÅ Product Details

BESTÅ Shelf unit with doors, white/Smeviken white, 47 1/4x16 1/2x25 1/4 "
Article number: 094.251.55
A simple unit can be enough storage for a limited space or the foundation for a larger storage solution if your needs change.
Everything you need for storing and keeping things organized at home. Choose a ready-made combination or create your own, adapted to your style and belongings. This is just one of many, many possibilities.
Measurements:
Width: 47 1/4 " (120 cm)Depth: 16 1/2 " (42 cm)
Height: 25 1/4 " (64 cm)
Need help?
Have a question about IKEA BESTÅ or Need to request a missing manual?
Questions and Answers
Number of questions: 3
Samantha Miller
Posted on Feb 18, 2023I'd like to know if it's possible to adjust the shelves in this BESTÅ shelf unit. If so, how do I do it?
Alice @ EasyRebuild
Answered on Feb 20, 2023Yes, the shelves in the BESTÅ shelf unit can be adjusted. To adjust the shelves:
1. Remove the doors by opening them fully and lifting them off the hinges.
2. Locate the shelf supports on the side panels. They are adjustable and can be moved up or down in increments.
3. Lift the shelf you want to reposition and move the shelf supports to the desired height.
4. Replace the shelf and ensure it is securely in place.
5. Repeat for any other shelves you want to adjust.
6. Reattach the doors once you've made all the adjustments.
This allows you to customize the shelf heights to accommodate your storage needs
Amber Cruz
Posted on Dec 17, 2022How do I attach the doors to the BESTÅ shelf unit?
Are there any specific screws or hardware required for this process?
Kenzo @ EasyRebuild
Answered on Dec 19, 2022To attach the doors to the BESTÅ shelf unit, you will need the following hardware:
- Hinges - The hinges are typically included in the BESTÅ door hardware pack. They will attach to the inside of the cabinet frame.
- Screws - You'll need short screws (usually 12-15mm length) to secure the hinges to the cabinet frame. The screws are also typically included in the door hardware pack.
The process is as follows:
1. Attach the hinges to the inside of the cabinet frame using the provided screws.
2. Align the door with the hinges and clip or snap the door into place on the hinges.
3. Adjust the door alignment as needed using the adjustment screws on the hinges.
Make sure to follow the step-by-step instructions included in the BESTÅ assembly manual carefully. This will ensure the doors are properly installed and functioning correctly
Robbins Kimberly
Posted on Nov 14, 2022How do I assemble the Bestå shelf unit with doors? I've received all the parts but I'm having trouble understanding the instructions. Can you provide a step-by-step guide or recommend a YouTube video that can help me with the assembly process?
Alice @ EasyRebuild
Answered on Nov 16, 2022To assemble the BESTÅ shelf unit with doors, follow these steps:
1. Lay out all the parts and hardware provided in the package and ensure you have everything needed based on the instructions.
2. Start by attaching the side panels to the top and bottom shelves using the screws and dowels. Make sure the panels are securely in place.
3. Next, install the hinges for the doors. Follow the instructions carefully to ensure the hinges are properly aligned.
4. Attach the doors to the hinges, adjusting them as needed to ensure a proper fit.
5. If your unit includes any drawers, install the drawer slides and then snap the drawers into place.
6. Finally, attach any additional shelves, brackets or other accessories as indicated in the instructions.
Take your time and double-check each step. There are also helpful assembly videos on the IKEA website that you can refer to if you need visual guidance


